SuperATV's Rear Disc Conversion
#1
 07-30-2014, 07:39 PM

Join Date: Aug 2010
Posts: 230
Likes: 0
Received 0 Likes
on
0 Posts
This is part number: RDBK-H.
Fits:
TRX300 2x4 1988-2000
TRX300 4x4 1988-2000
TRX350 RANCHER 2x4 2000-2006
TRX350 RANCHER 4x4 2000-2006
TRX400AT RANCHER 400 2004-2007
TRX420 RANCHER 4x2 2007-NEWER (with Solid Rear AXLE, not IRS MODELS)
TRX420 RANCHER 4x4 2007-NEWER (with Solid Rear AXLE, not IRS MODELS)
TRX400 FOREMAN 4x4 1995-2003
TRX500 RUBICON 2001- NEWER
TRX500 FOREMAN 500 2005-NEWER
So we start it off, everything was packaged nicely.
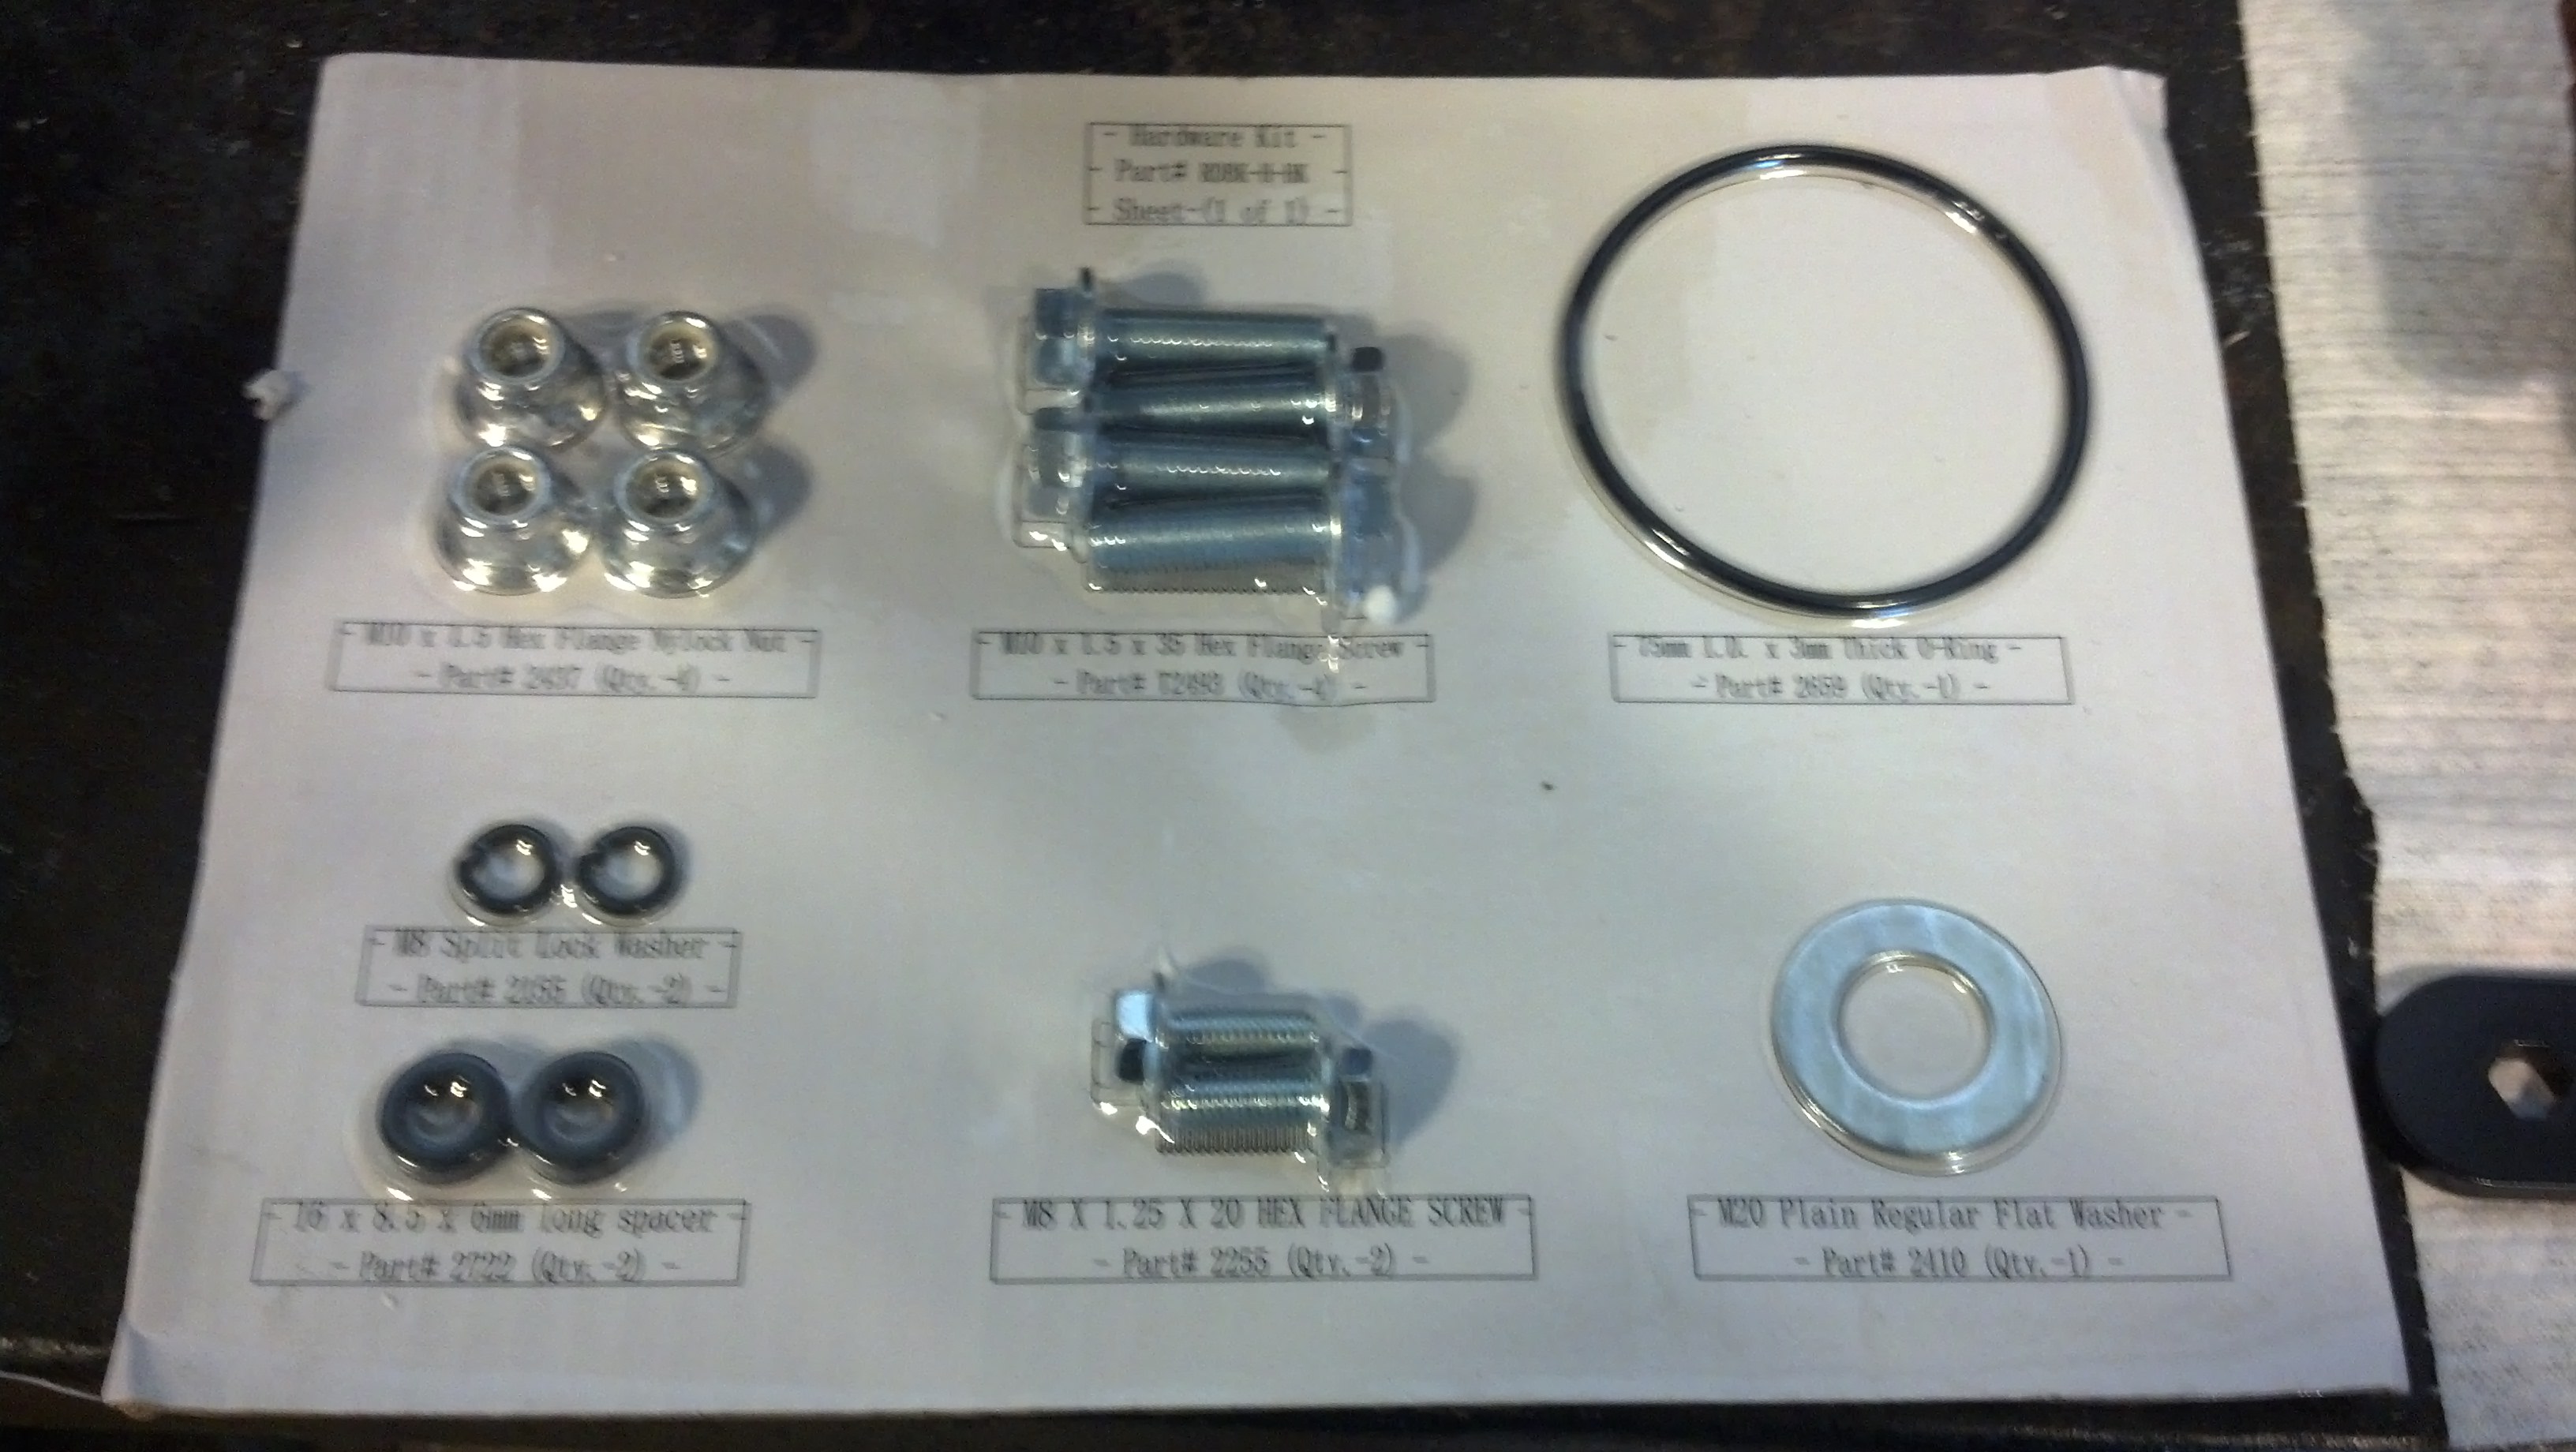
Full color instructions....nice touch:
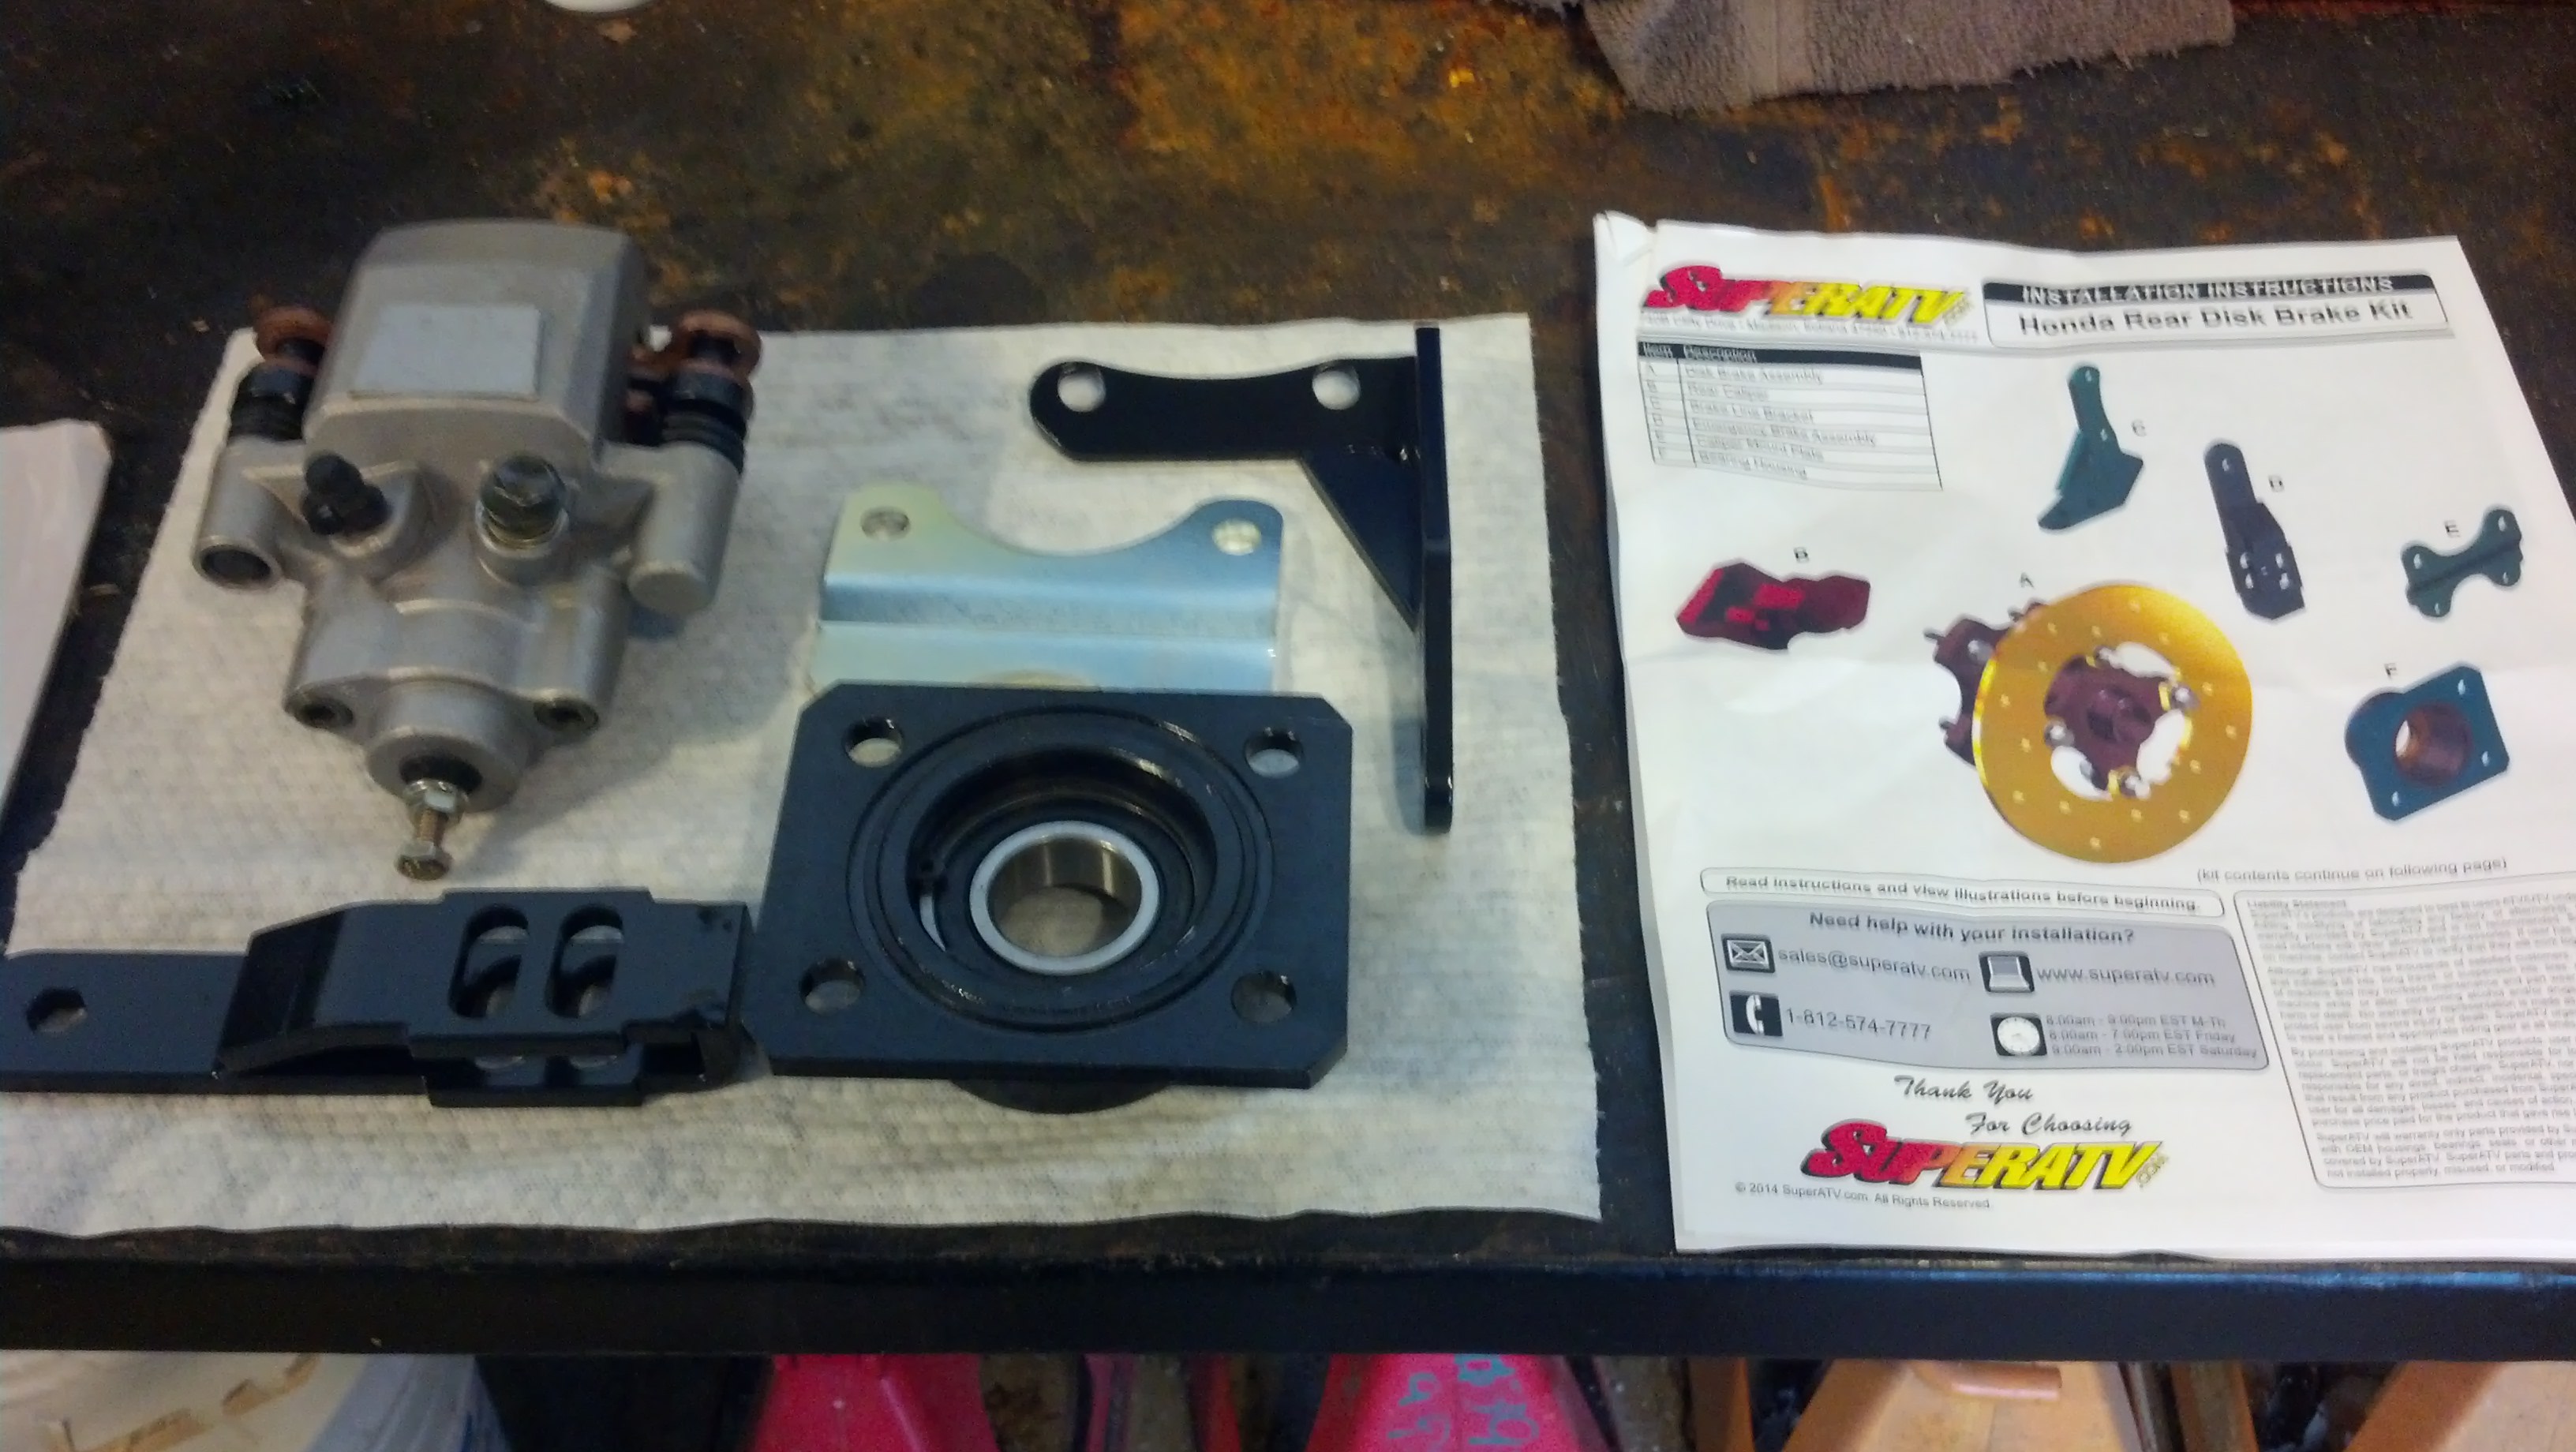
Disc looks sturdy:
-----------------------
Fits:
TRX300 2x4 1988-2000
TRX300 4x4 1988-2000
TRX350 RANCHER 2x4 2000-2006
TRX350 RANCHER 4x4 2000-2006
TRX400AT RANCHER 400 2004-2007
TRX420 RANCHER 4x2 2007-NEWER (with Solid Rear AXLE, not IRS MODELS)
TRX420 RANCHER 4x4 2007-NEWER (with Solid Rear AXLE, not IRS MODELS)
TRX400 FOREMAN 4x4 1995-2003
TRX500 RUBICON 2001- NEWER
TRX500 FOREMAN 500 2005-NEWER
So we start it off, everything was packaged nicely.

Full color instructions....nice touch:

Disc looks sturdy:

-----------------------
#2
07-30-2014, 07:40 PM
Join Date: Aug 2010
Posts: 230
Likes: 0
Received 0 Likes
on
0 Posts
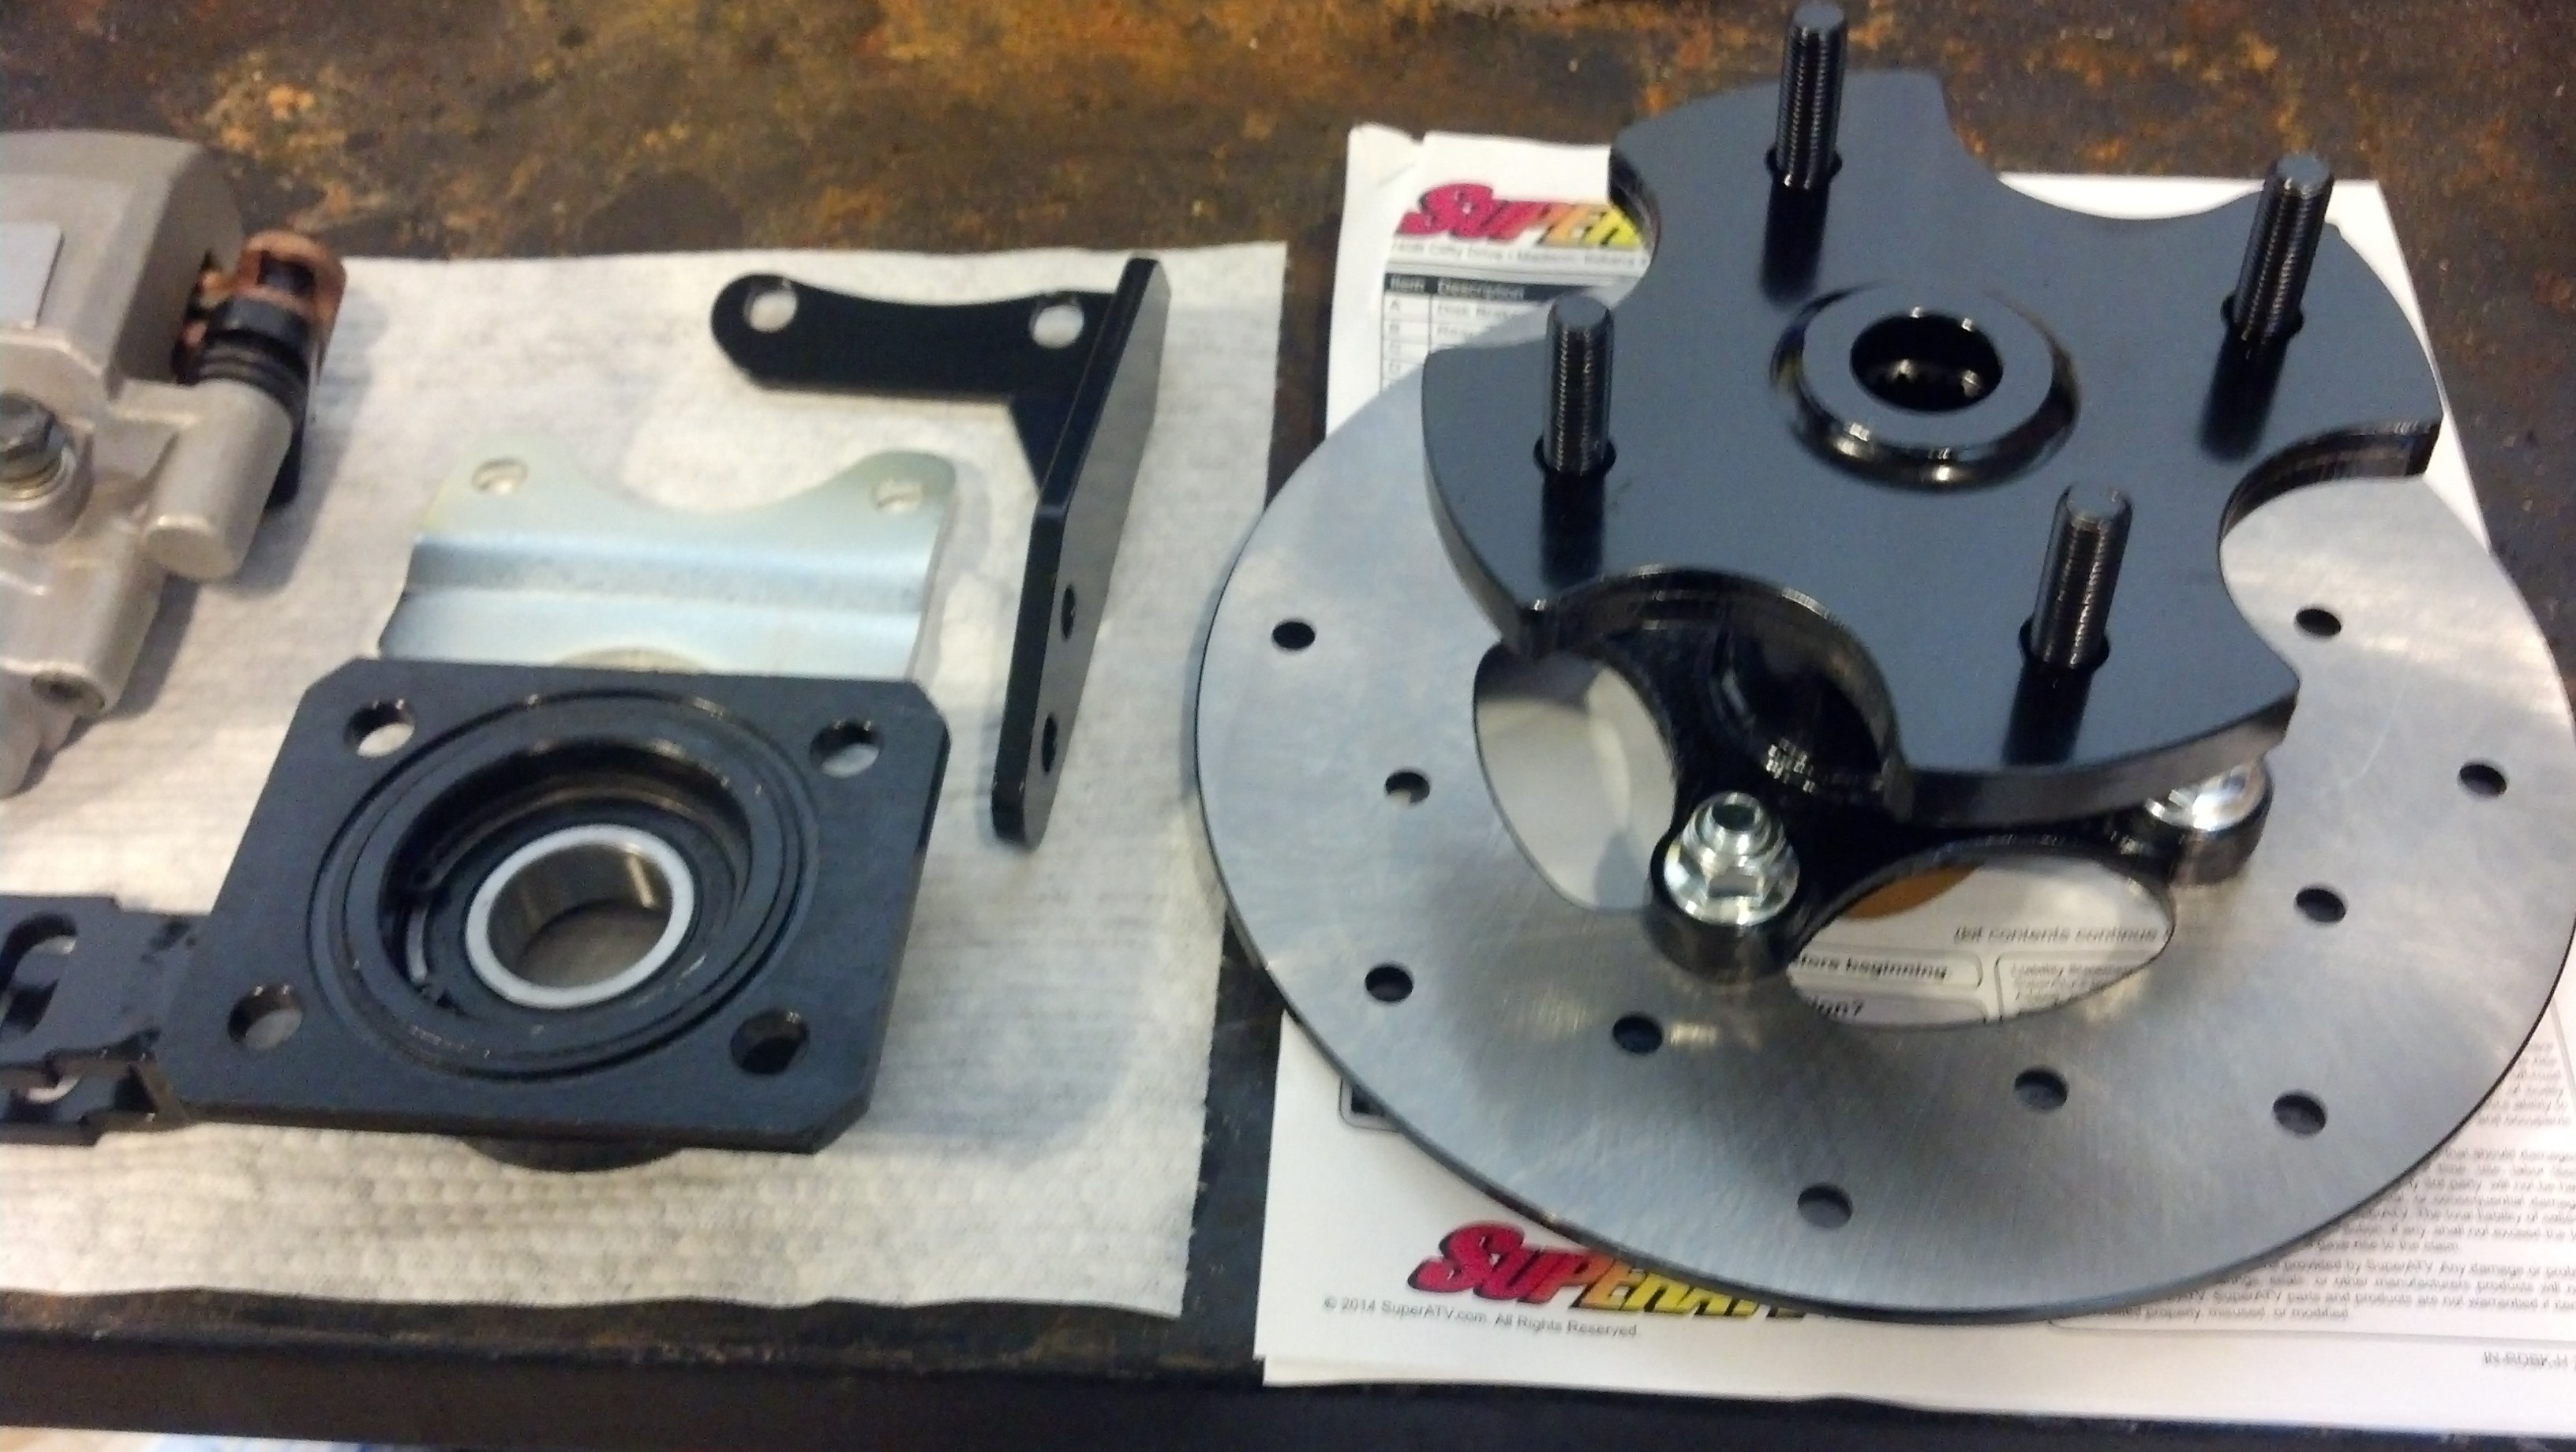
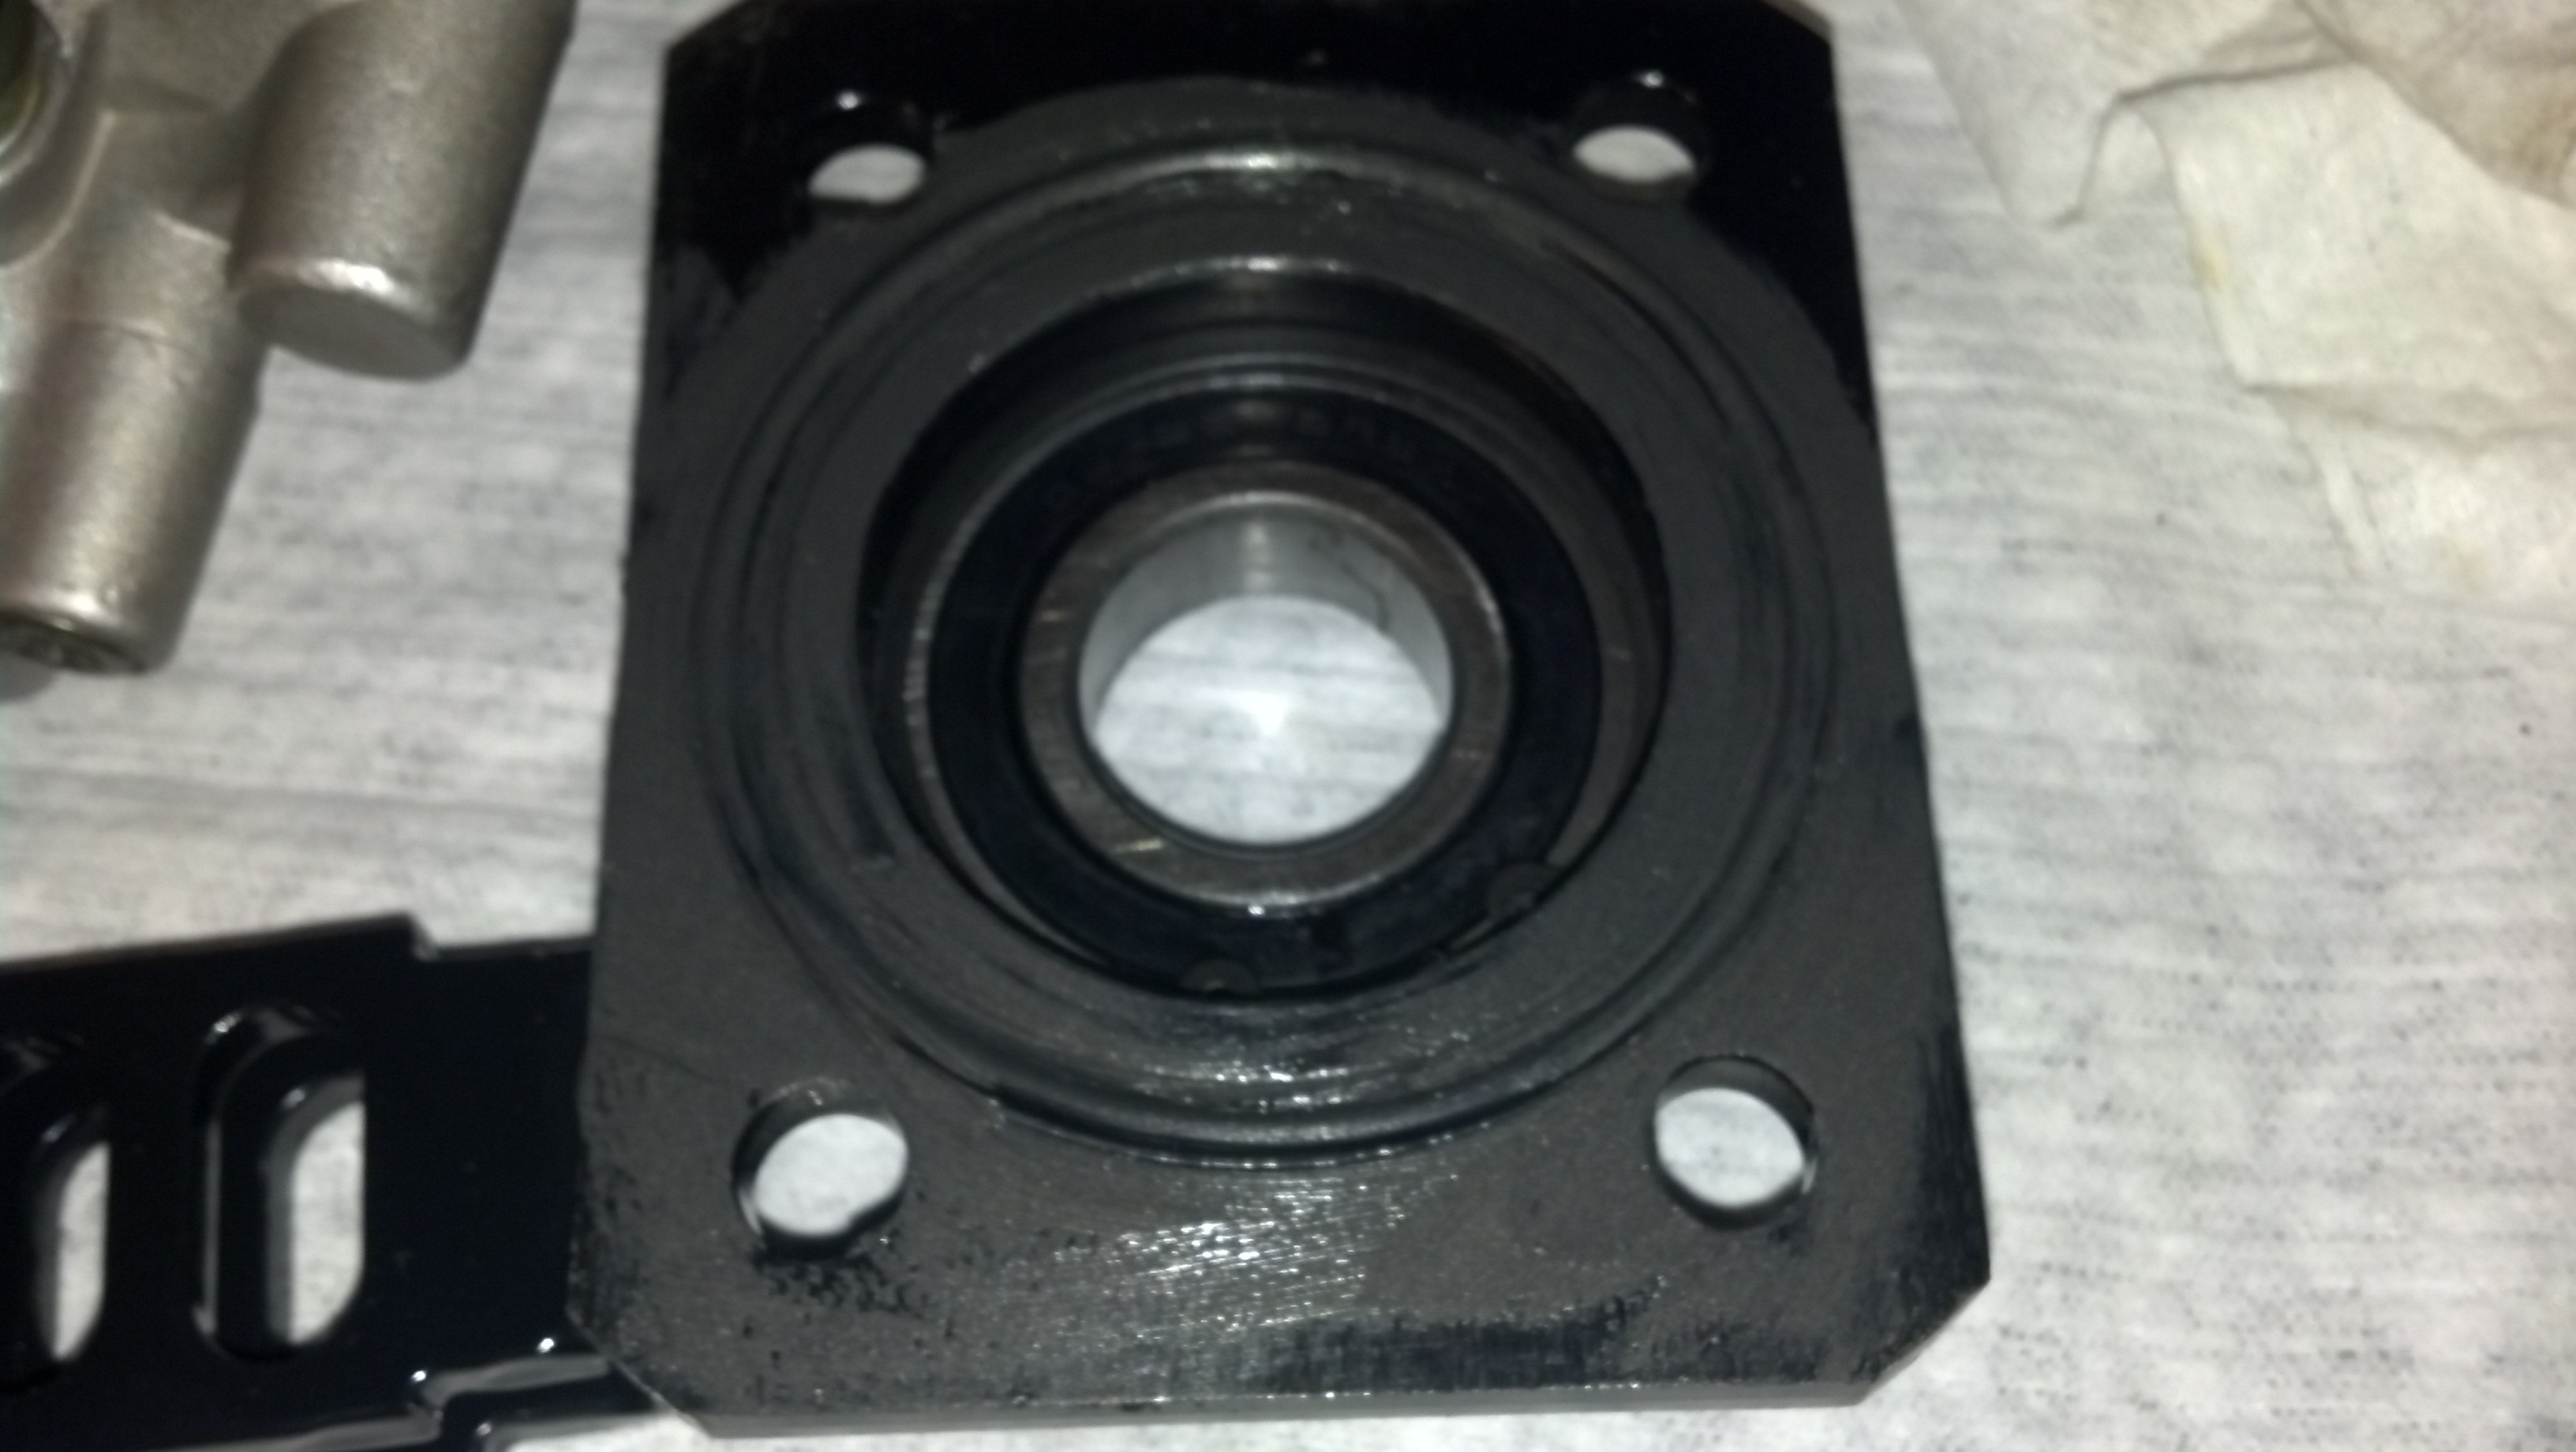
This is the new bearing part number, already assembled:

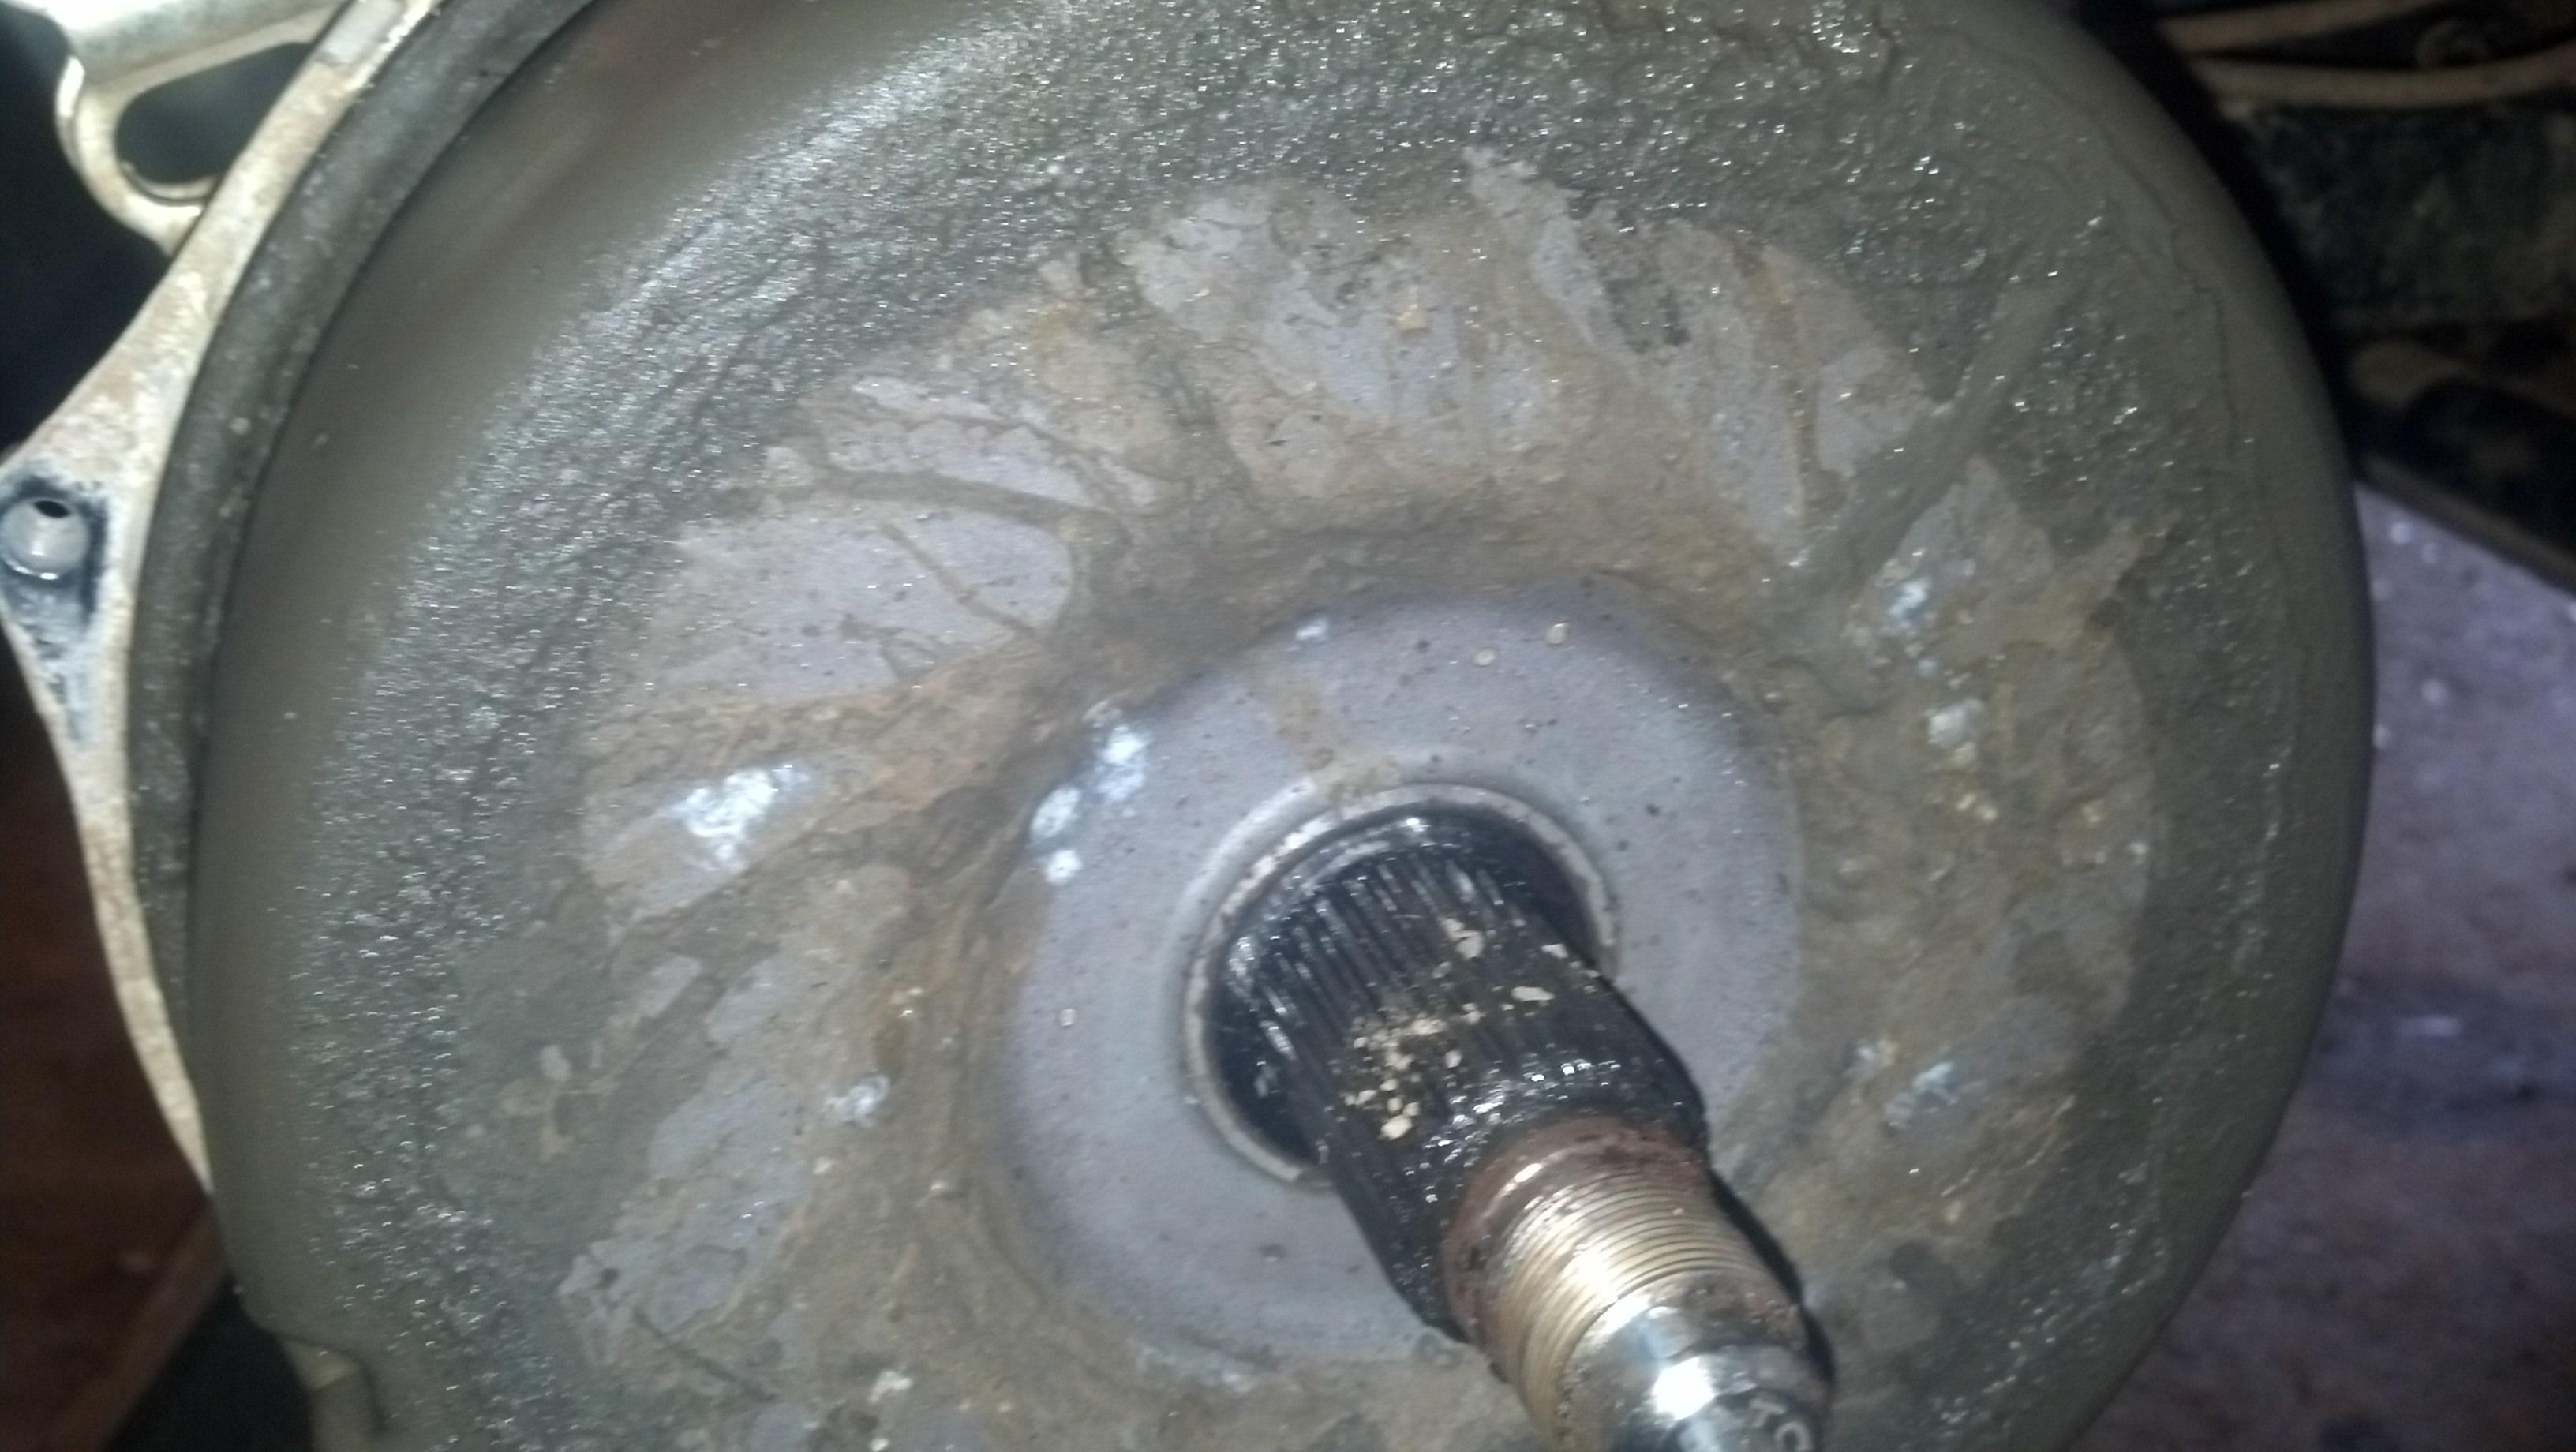
For those not that familiar with the outboard drum setup on the 500 foreman, this it.
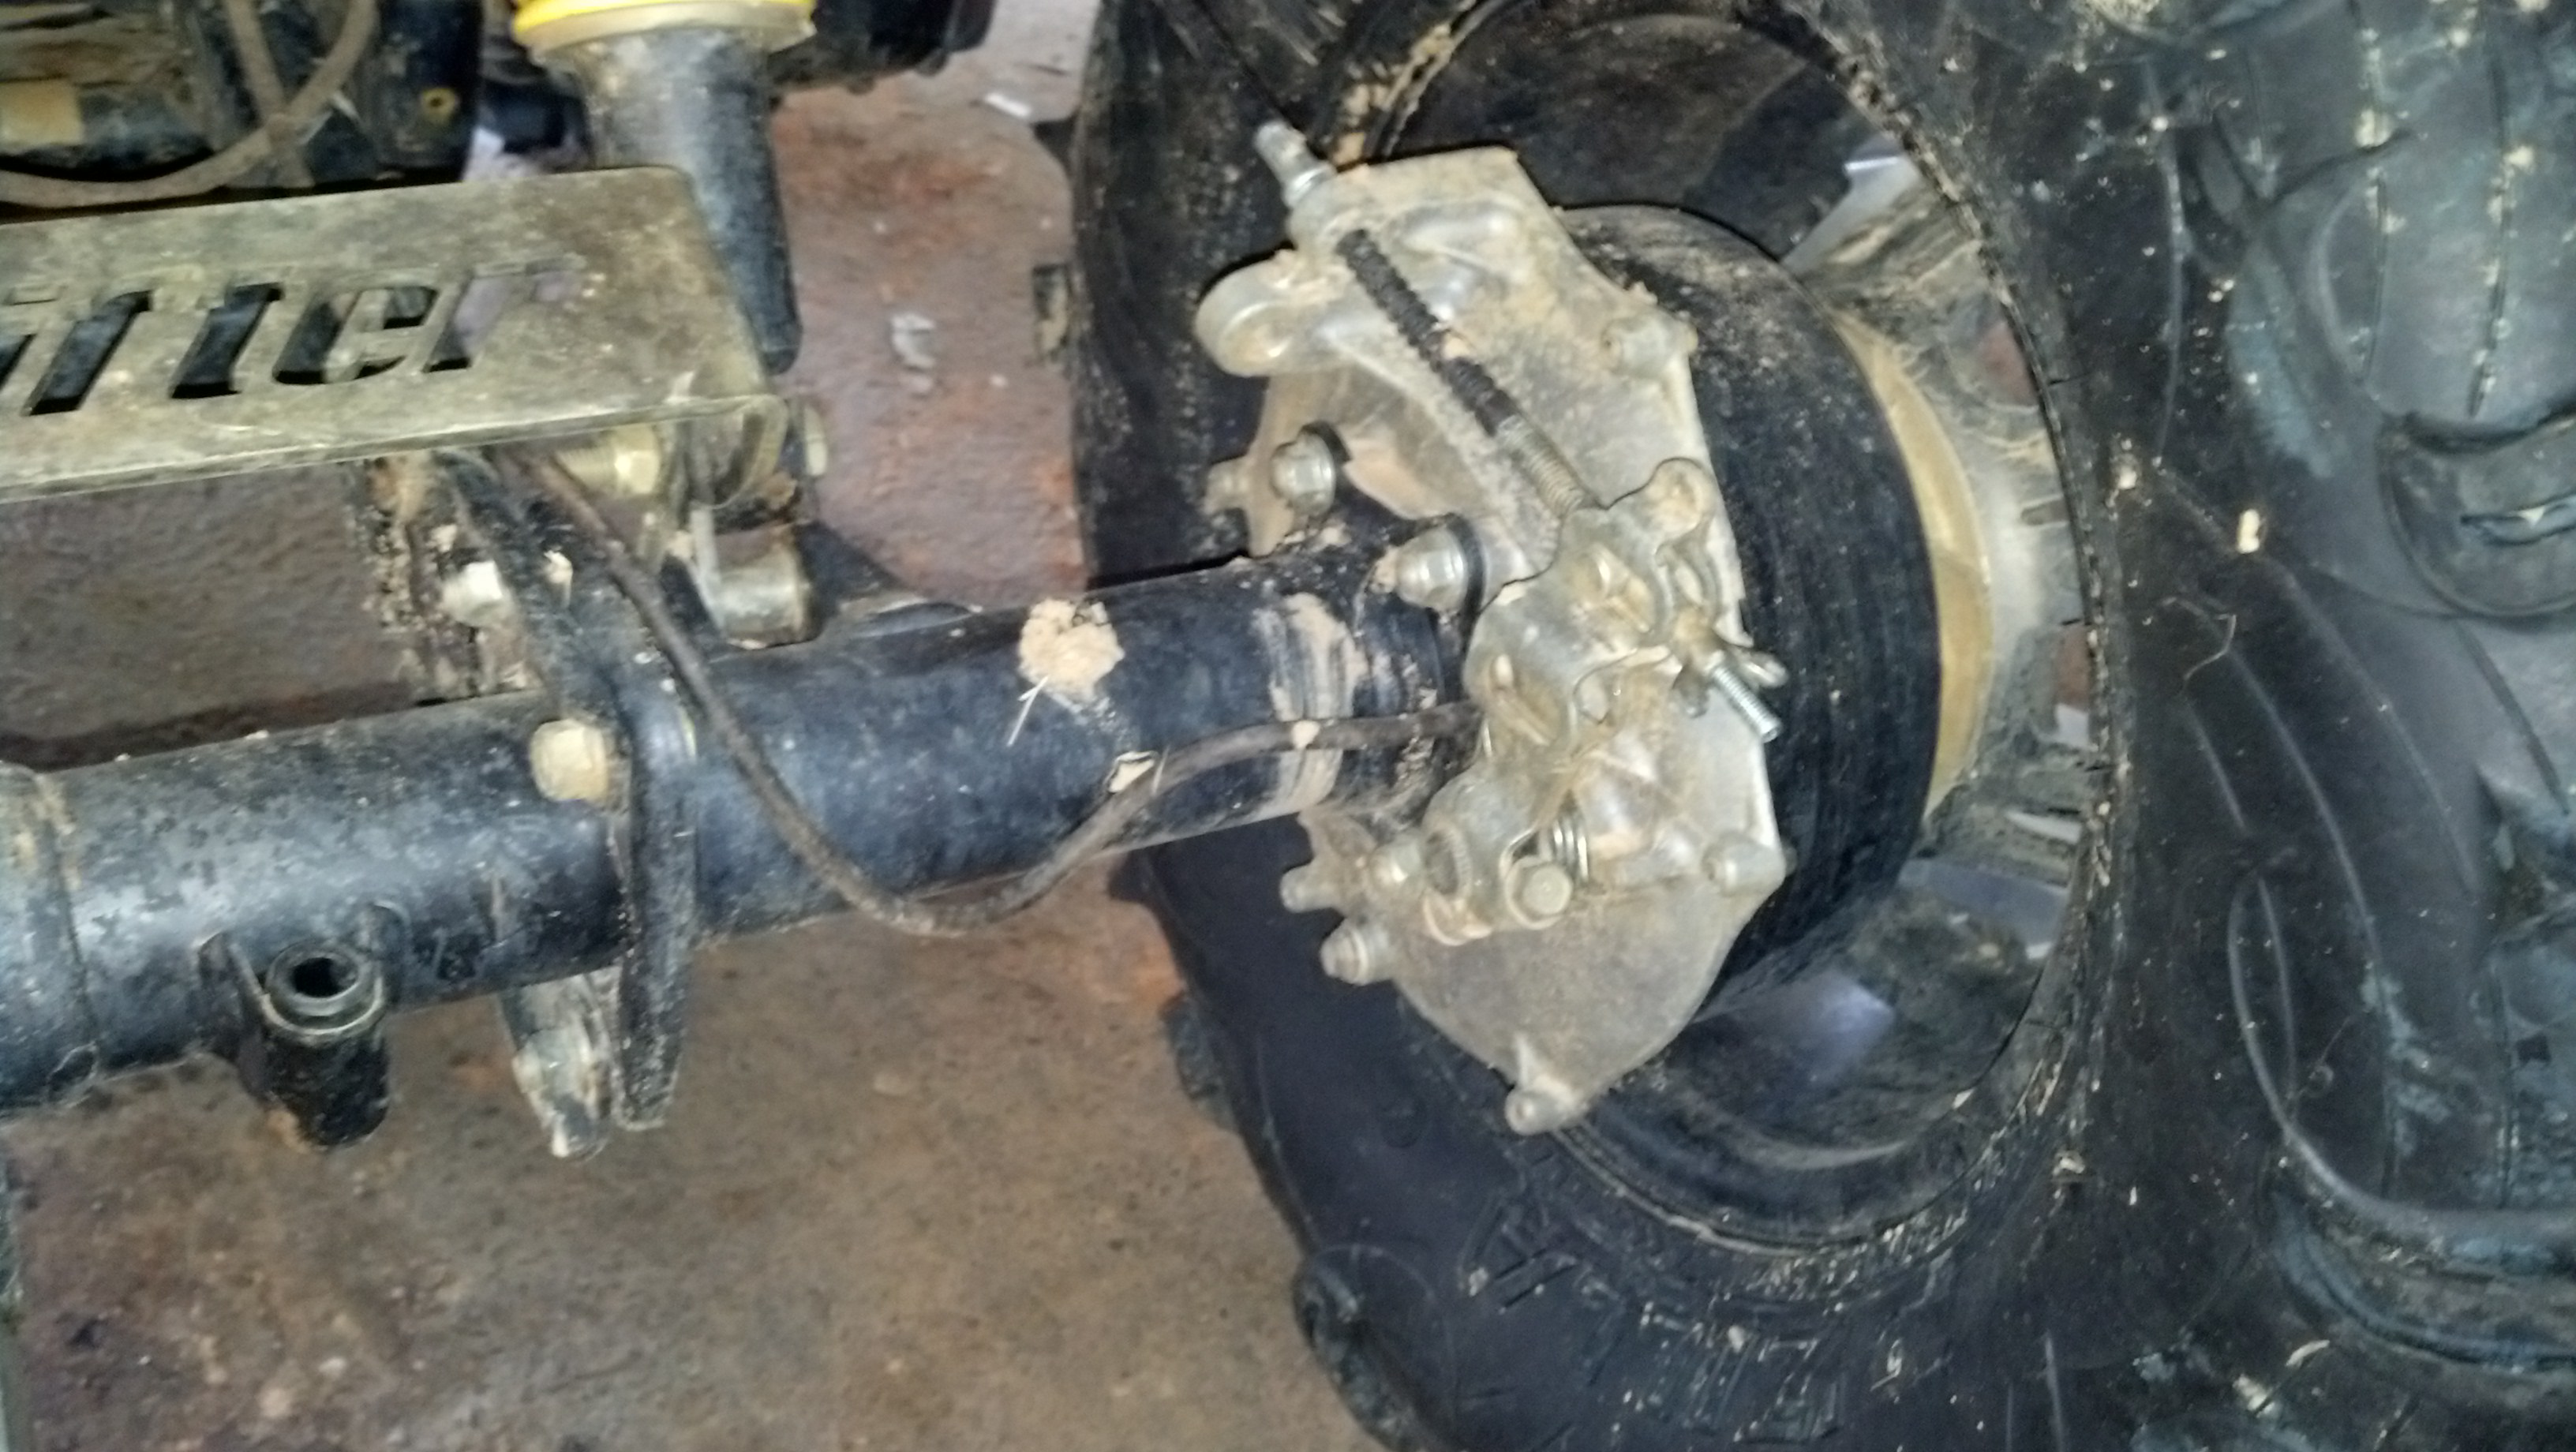
A little closer pic:
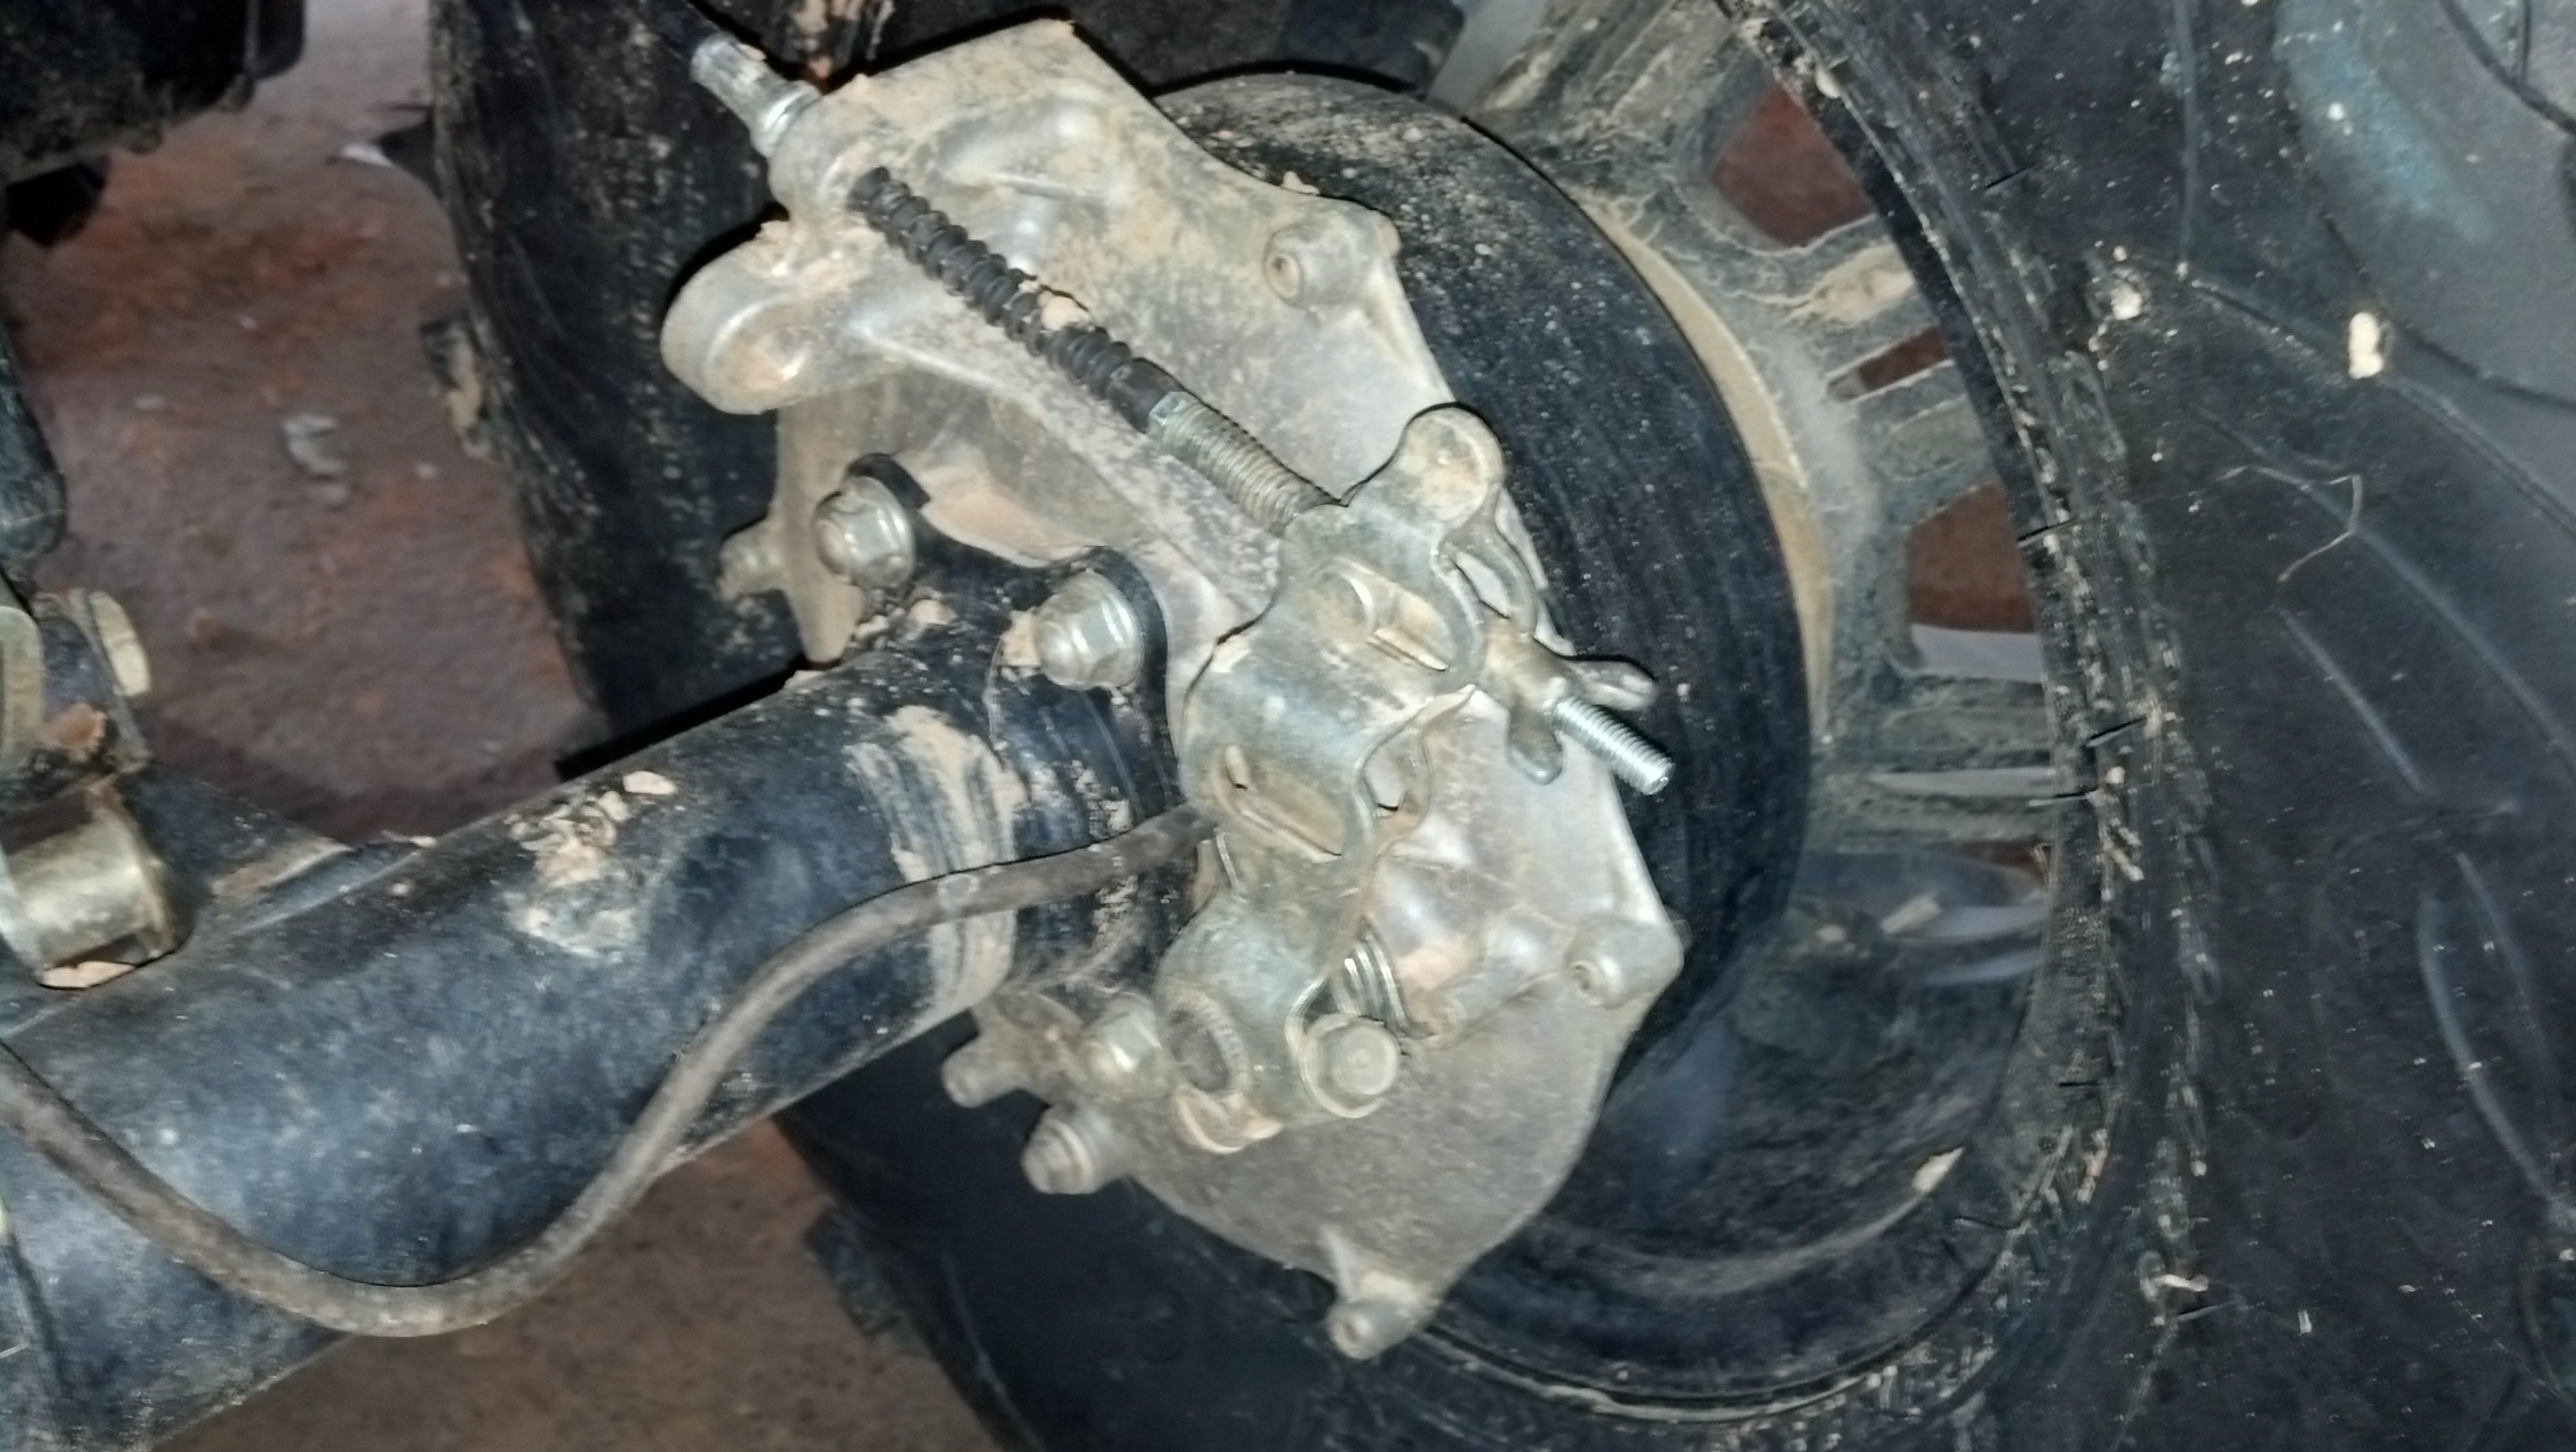
You'll notice from this pic I had to cut a stud off so I could get a wrench on the castle nut. It would not budge otherwise as I didn't have the correct sized socket. This was stock as assembled by Honda and 8 years old.
You can see the dust cover seal has already taken some punishment, and would be a high failure point due to constant clay mud and water intrusion.
---------------------------

For those not that familiar with the outboard drum setup on the 500 foreman, this it.

A little closer pic:

You'll notice from this pic I had to cut a stud off so I could get a wrench on the castle nut. It would not budge otherwise as I didn't have the correct sized socket. This was stock as assembled by Honda and 8 years old.

You can see the dust cover seal has already taken some punishment, and would be a high failure point due to constant clay mud and water intrusion.

---------------------------
#3
07-30-2014, 07:40 PM
Join Date: Aug 2010
Posts: 230
Likes: 0
Received 0 Likes
on
0 Posts
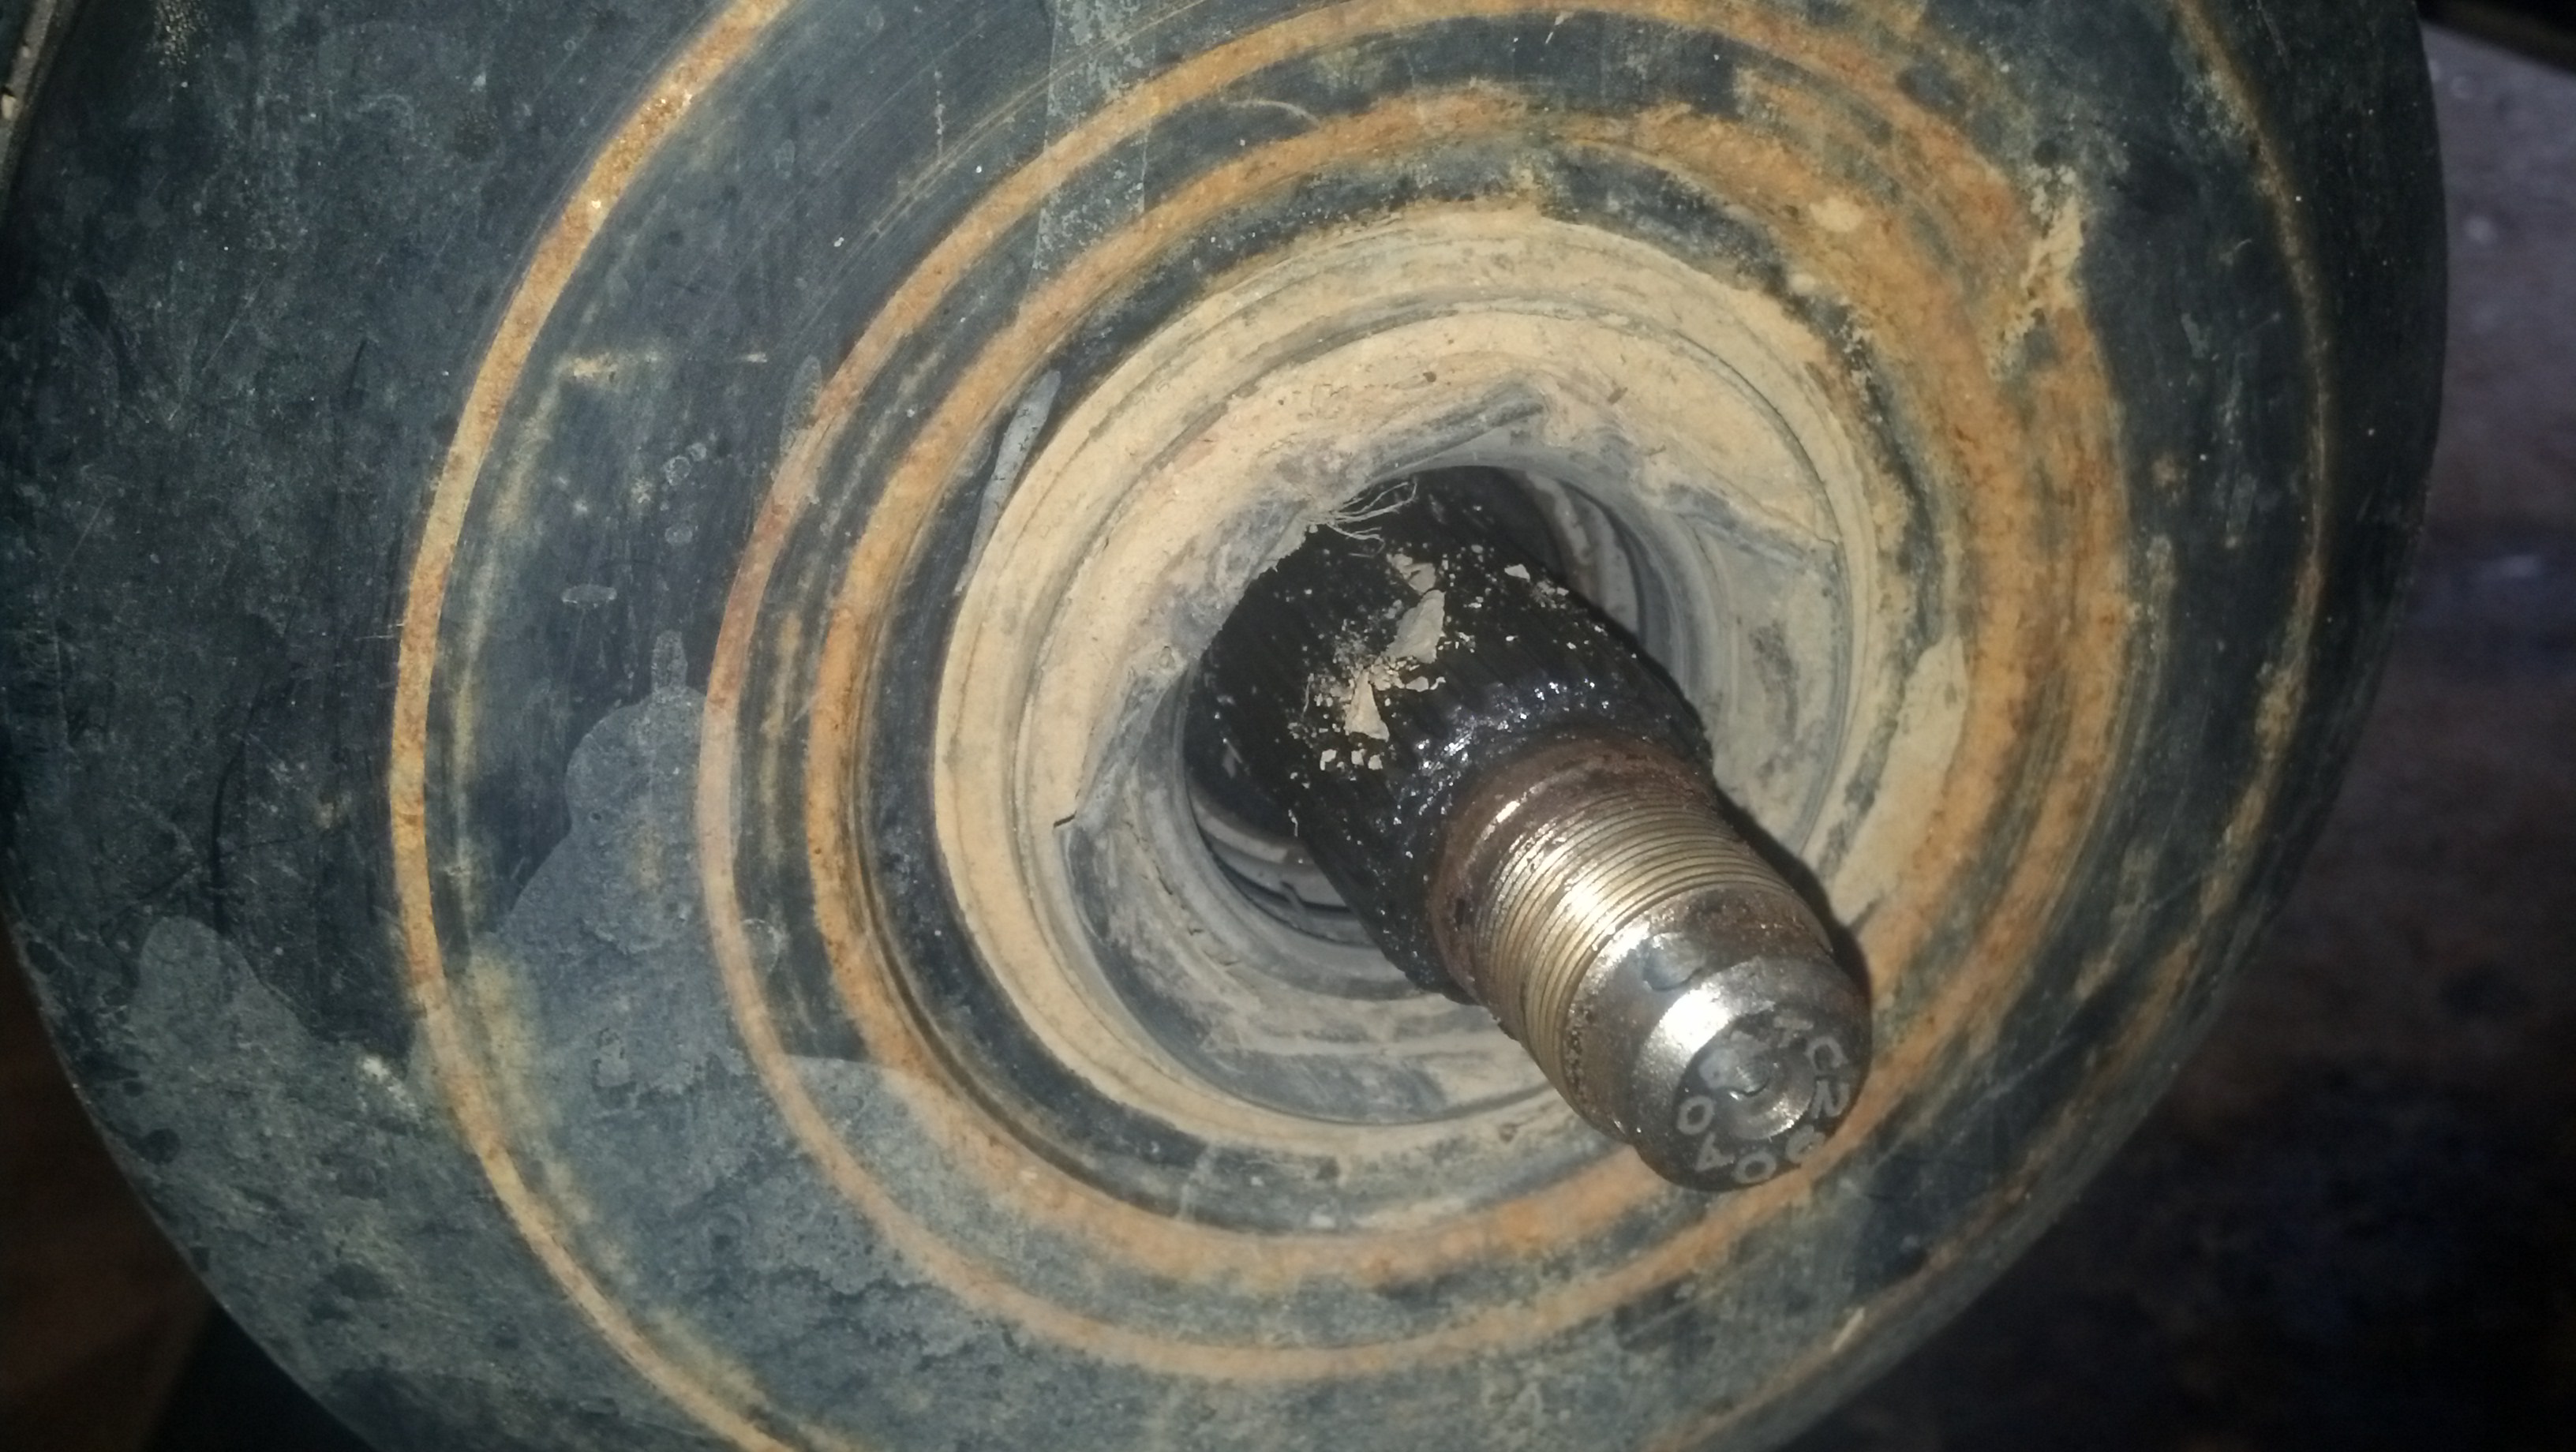
This smelled like straight cow manure. Apparently it had been hiding in there for some time:
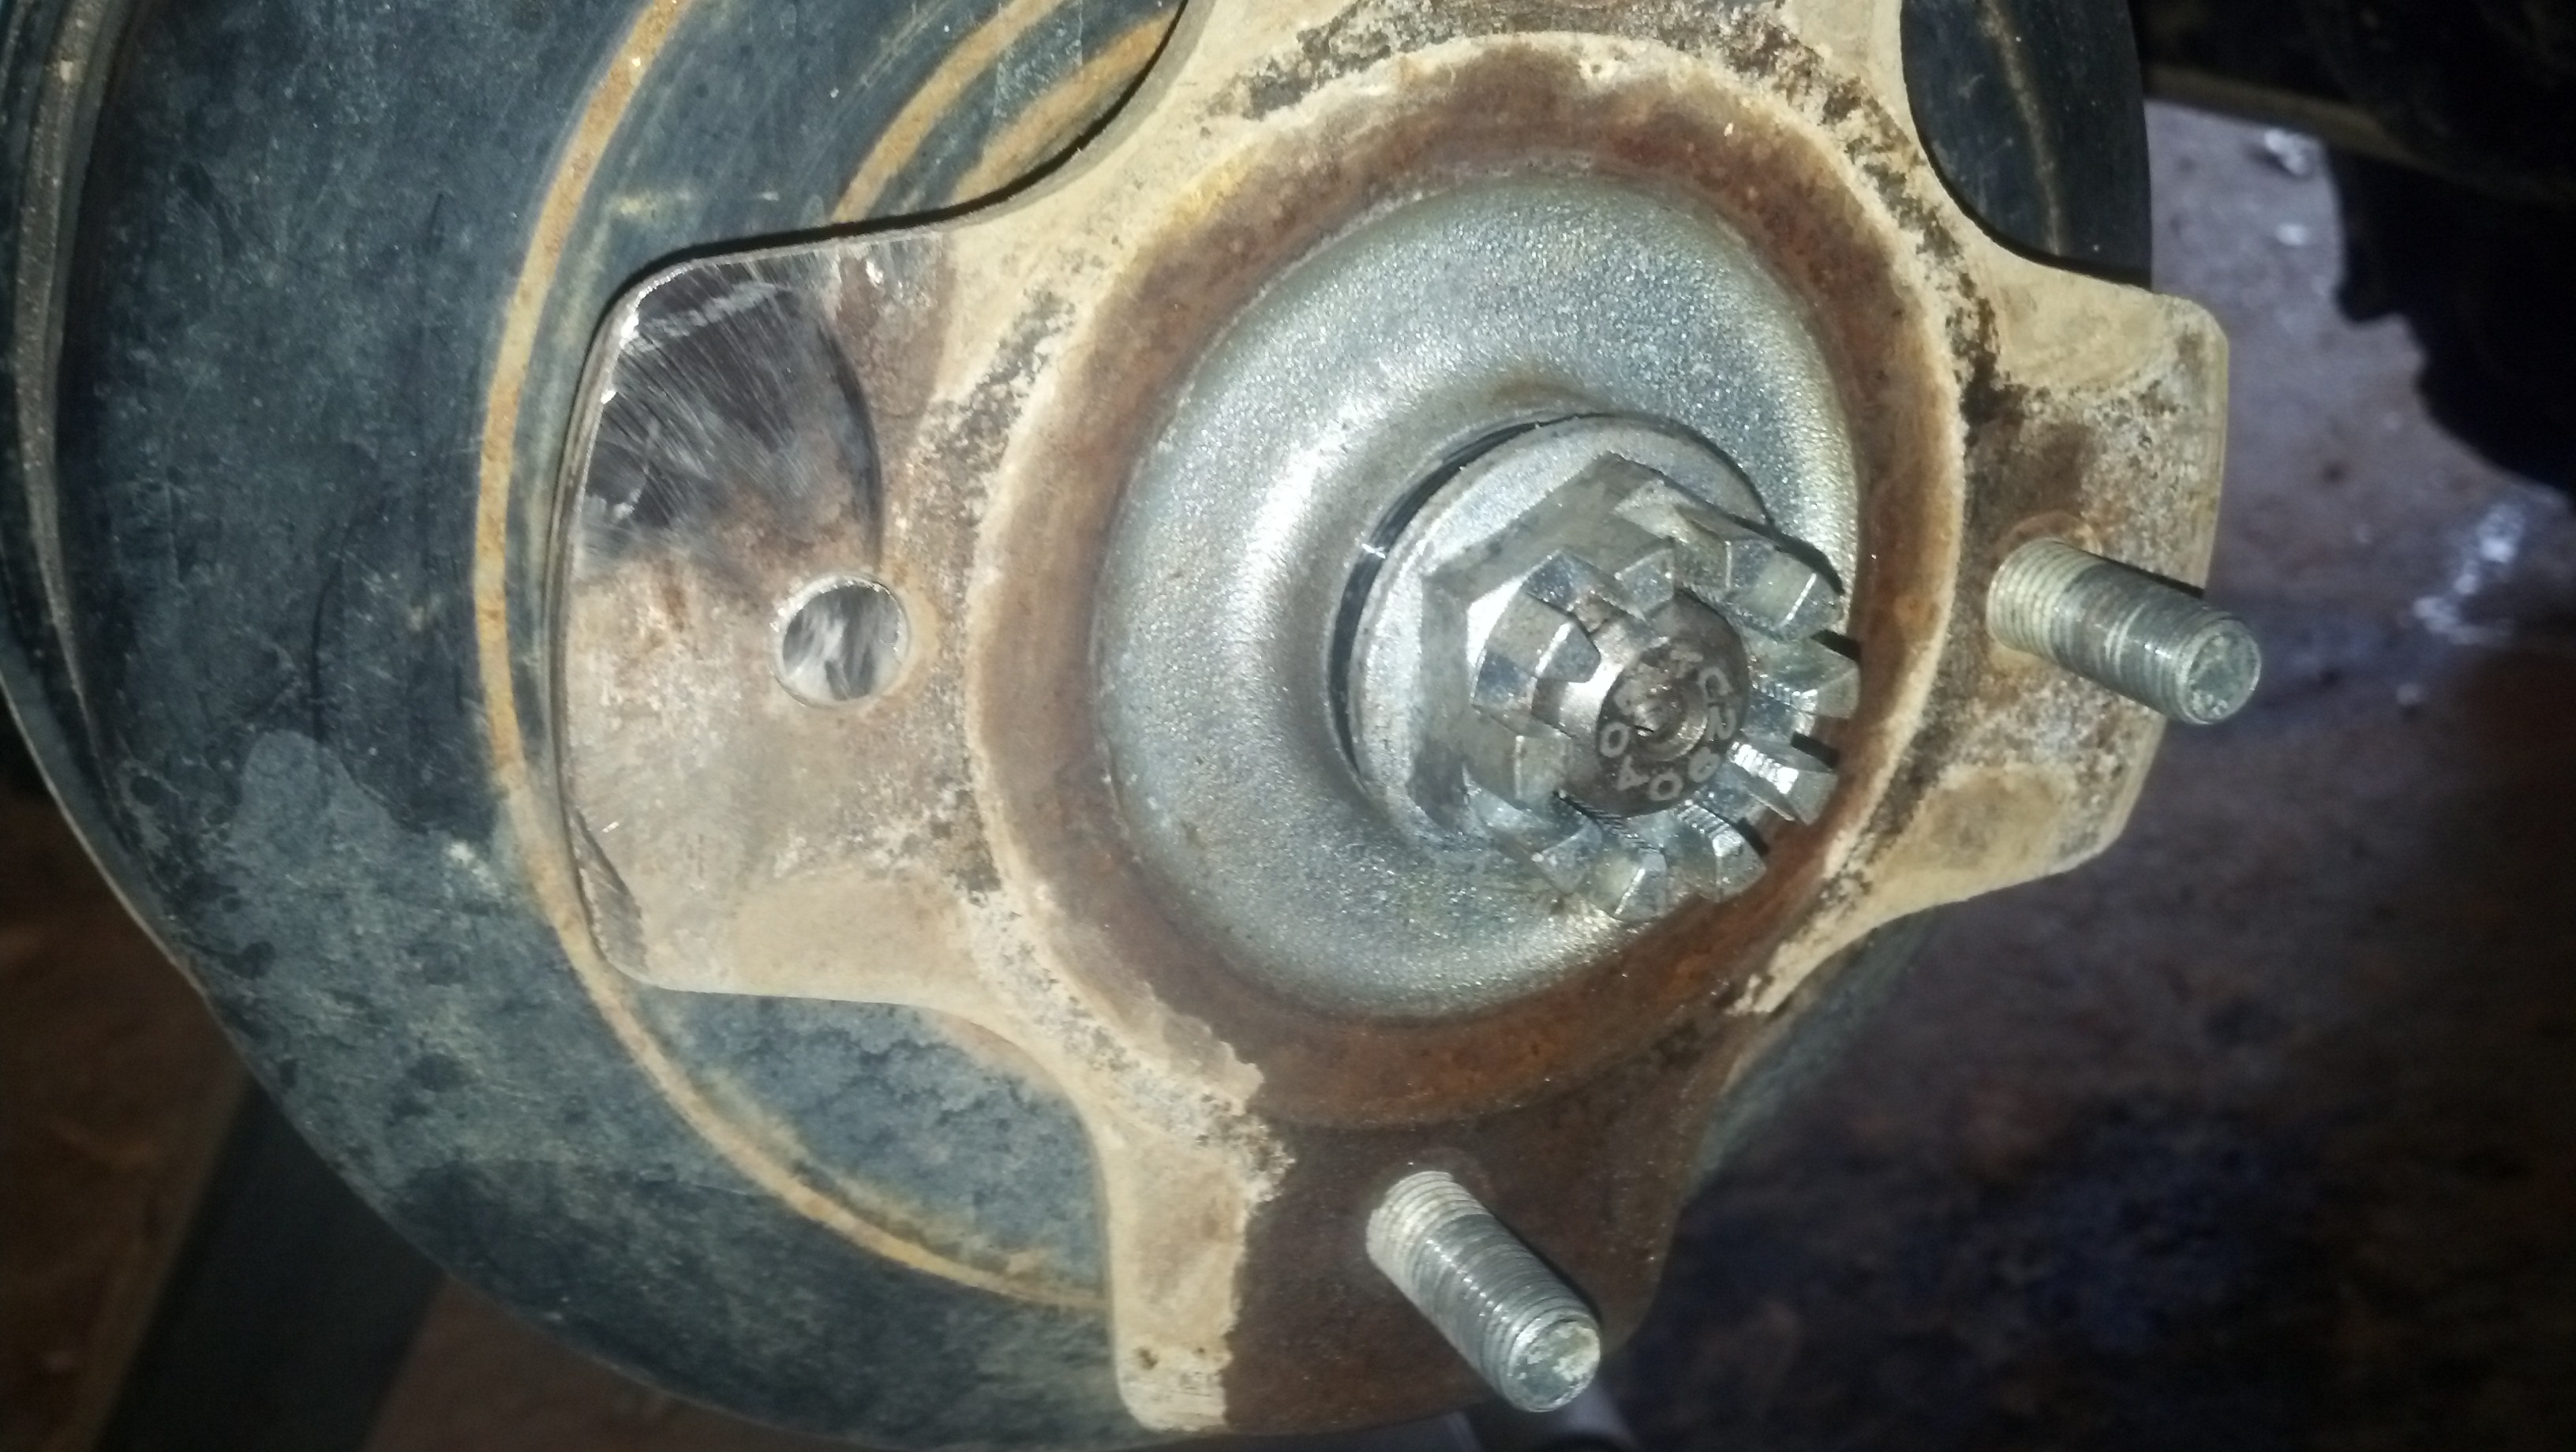
And this is the drum, besides being wet, overall in good shape (750 miles)
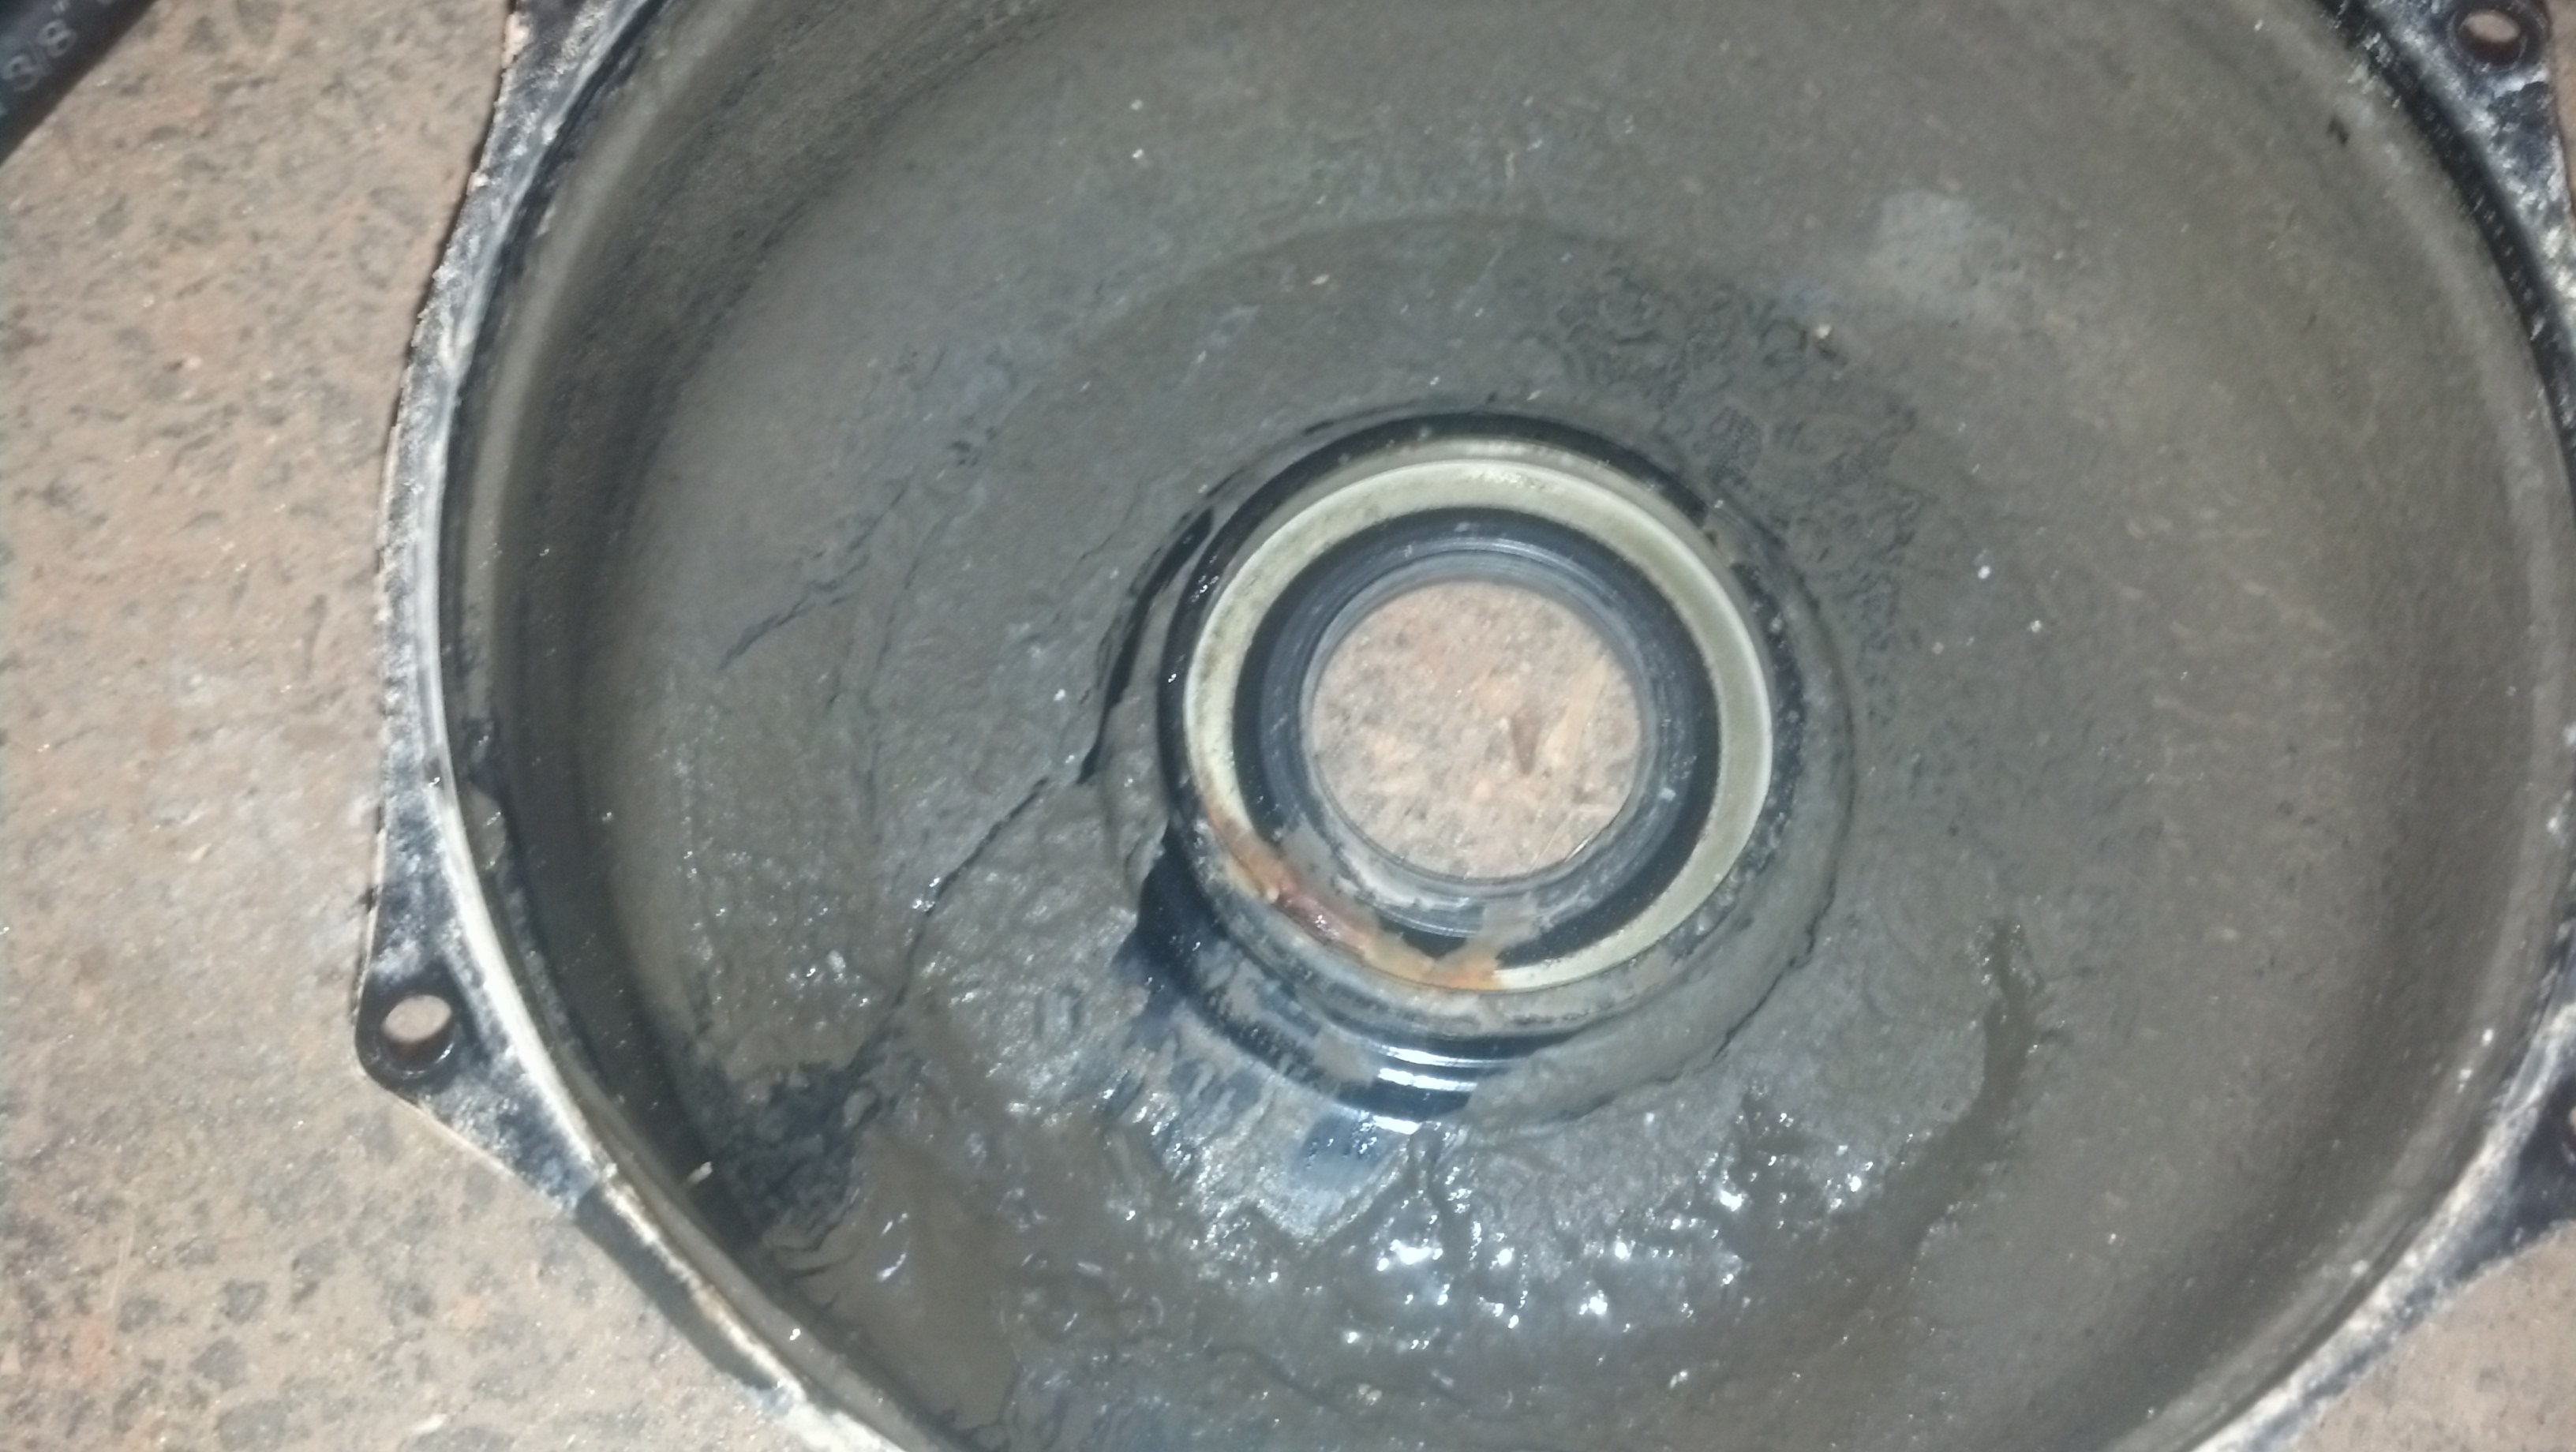
What hides beneath is a mess. There is stuff growing in there.....absolutely due to owner neglect.
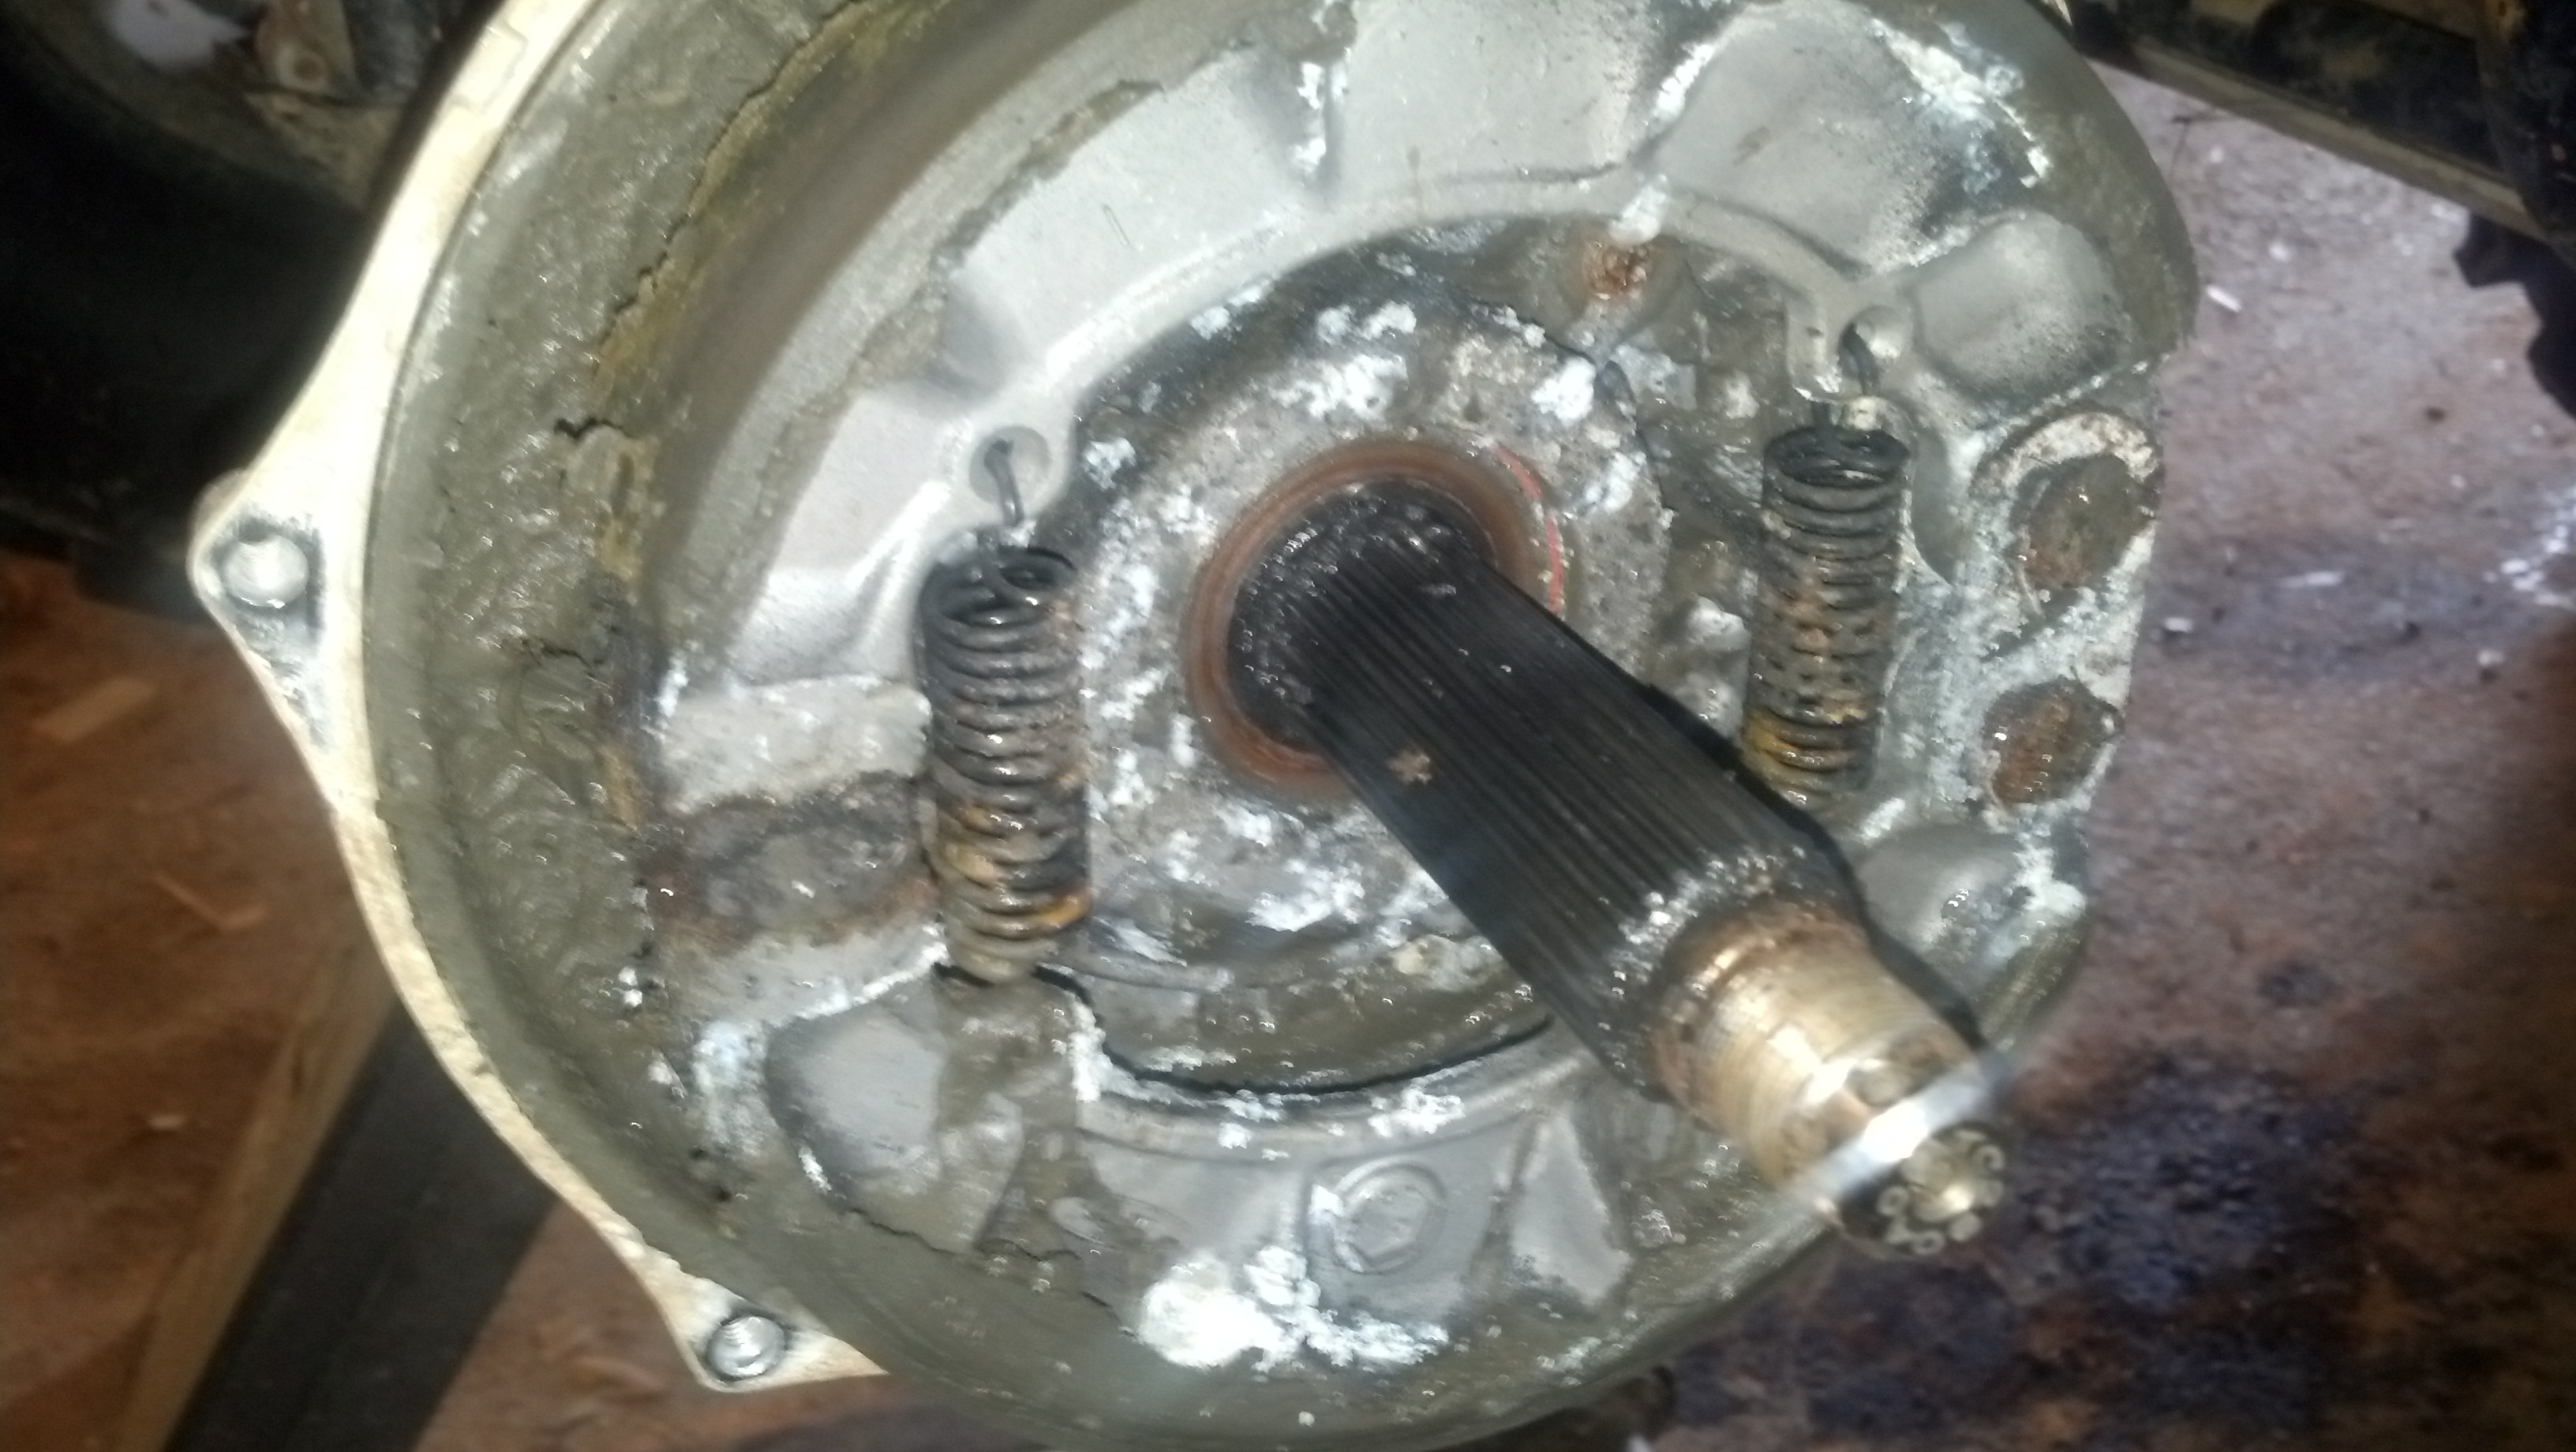
With the pads moved out of the way:
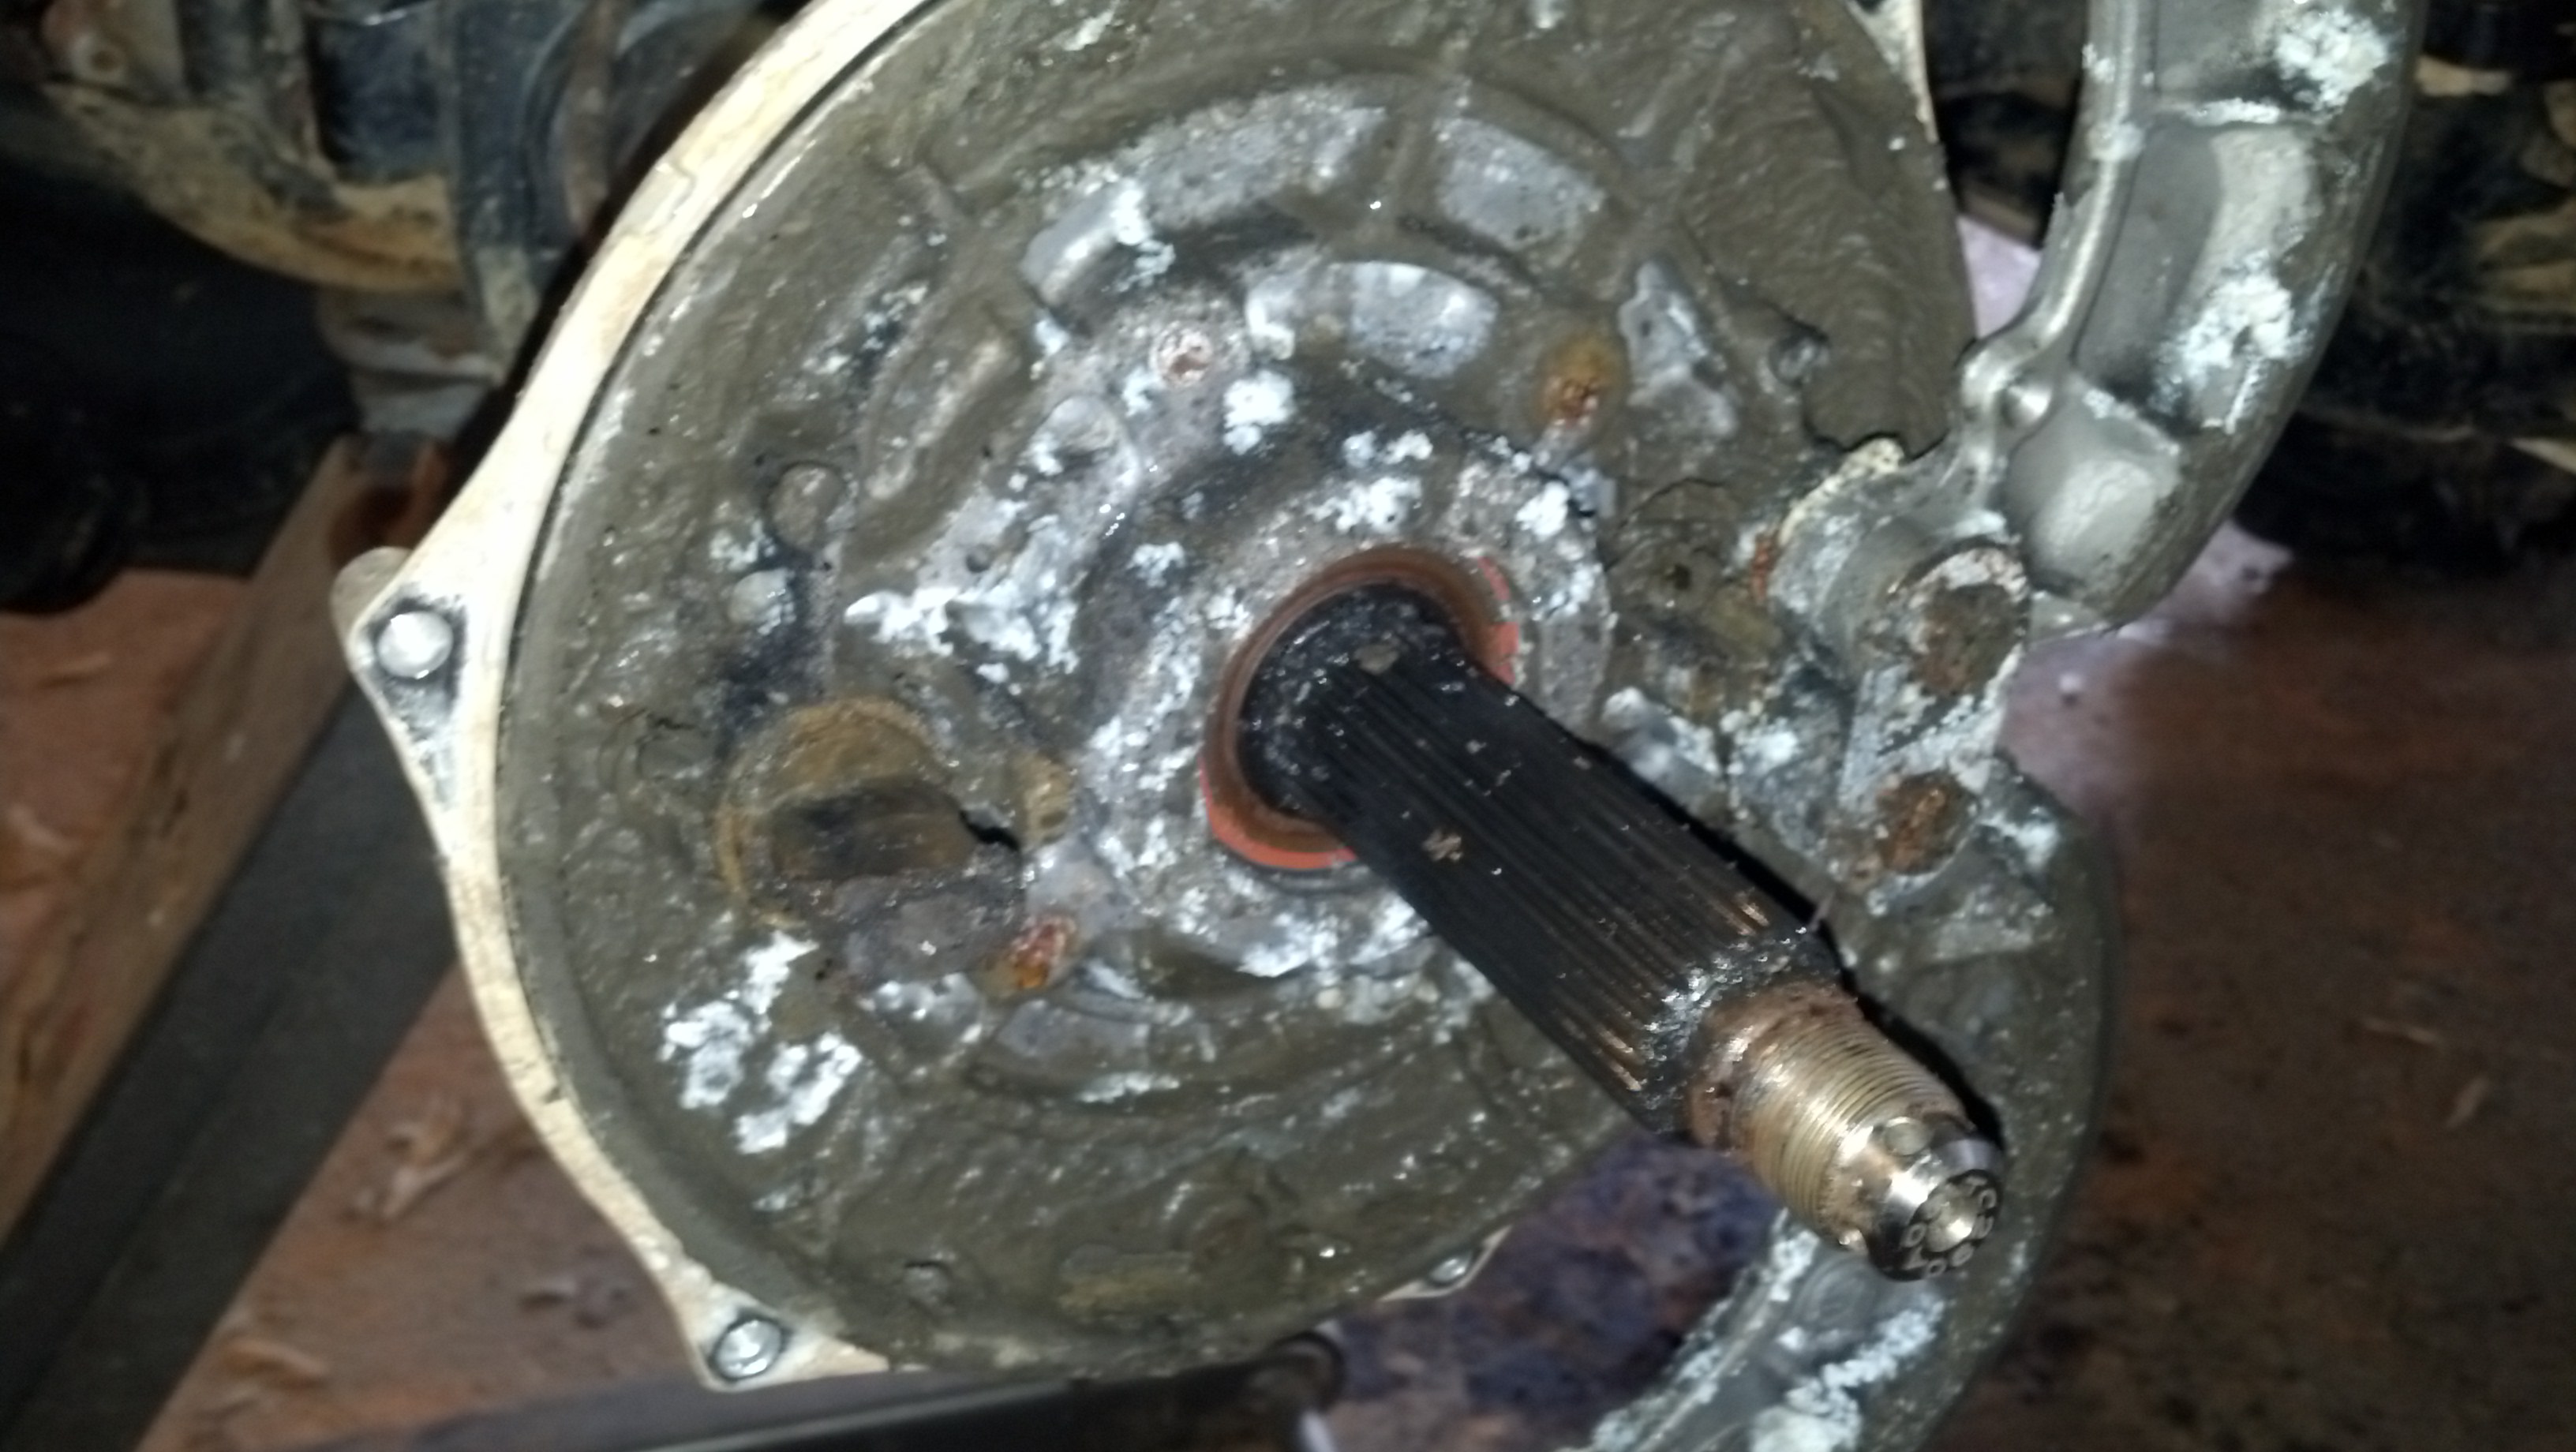
Dis-assembly complete. Now its time to install the new stuff.
----------------------

And this is the drum, besides being wet, overall in good shape (750 miles)

What hides beneath is a mess. There is stuff growing in there.....absolutely due to owner neglect.

With the pads moved out of the way:

Dis-assembly complete. Now its time to install the new stuff.

----------------------
#4
07-30-2014, 07:41 PM
Join Date: Aug 2010
Posts: 230
Likes: 0
Received 0 Likes
on
0 Posts
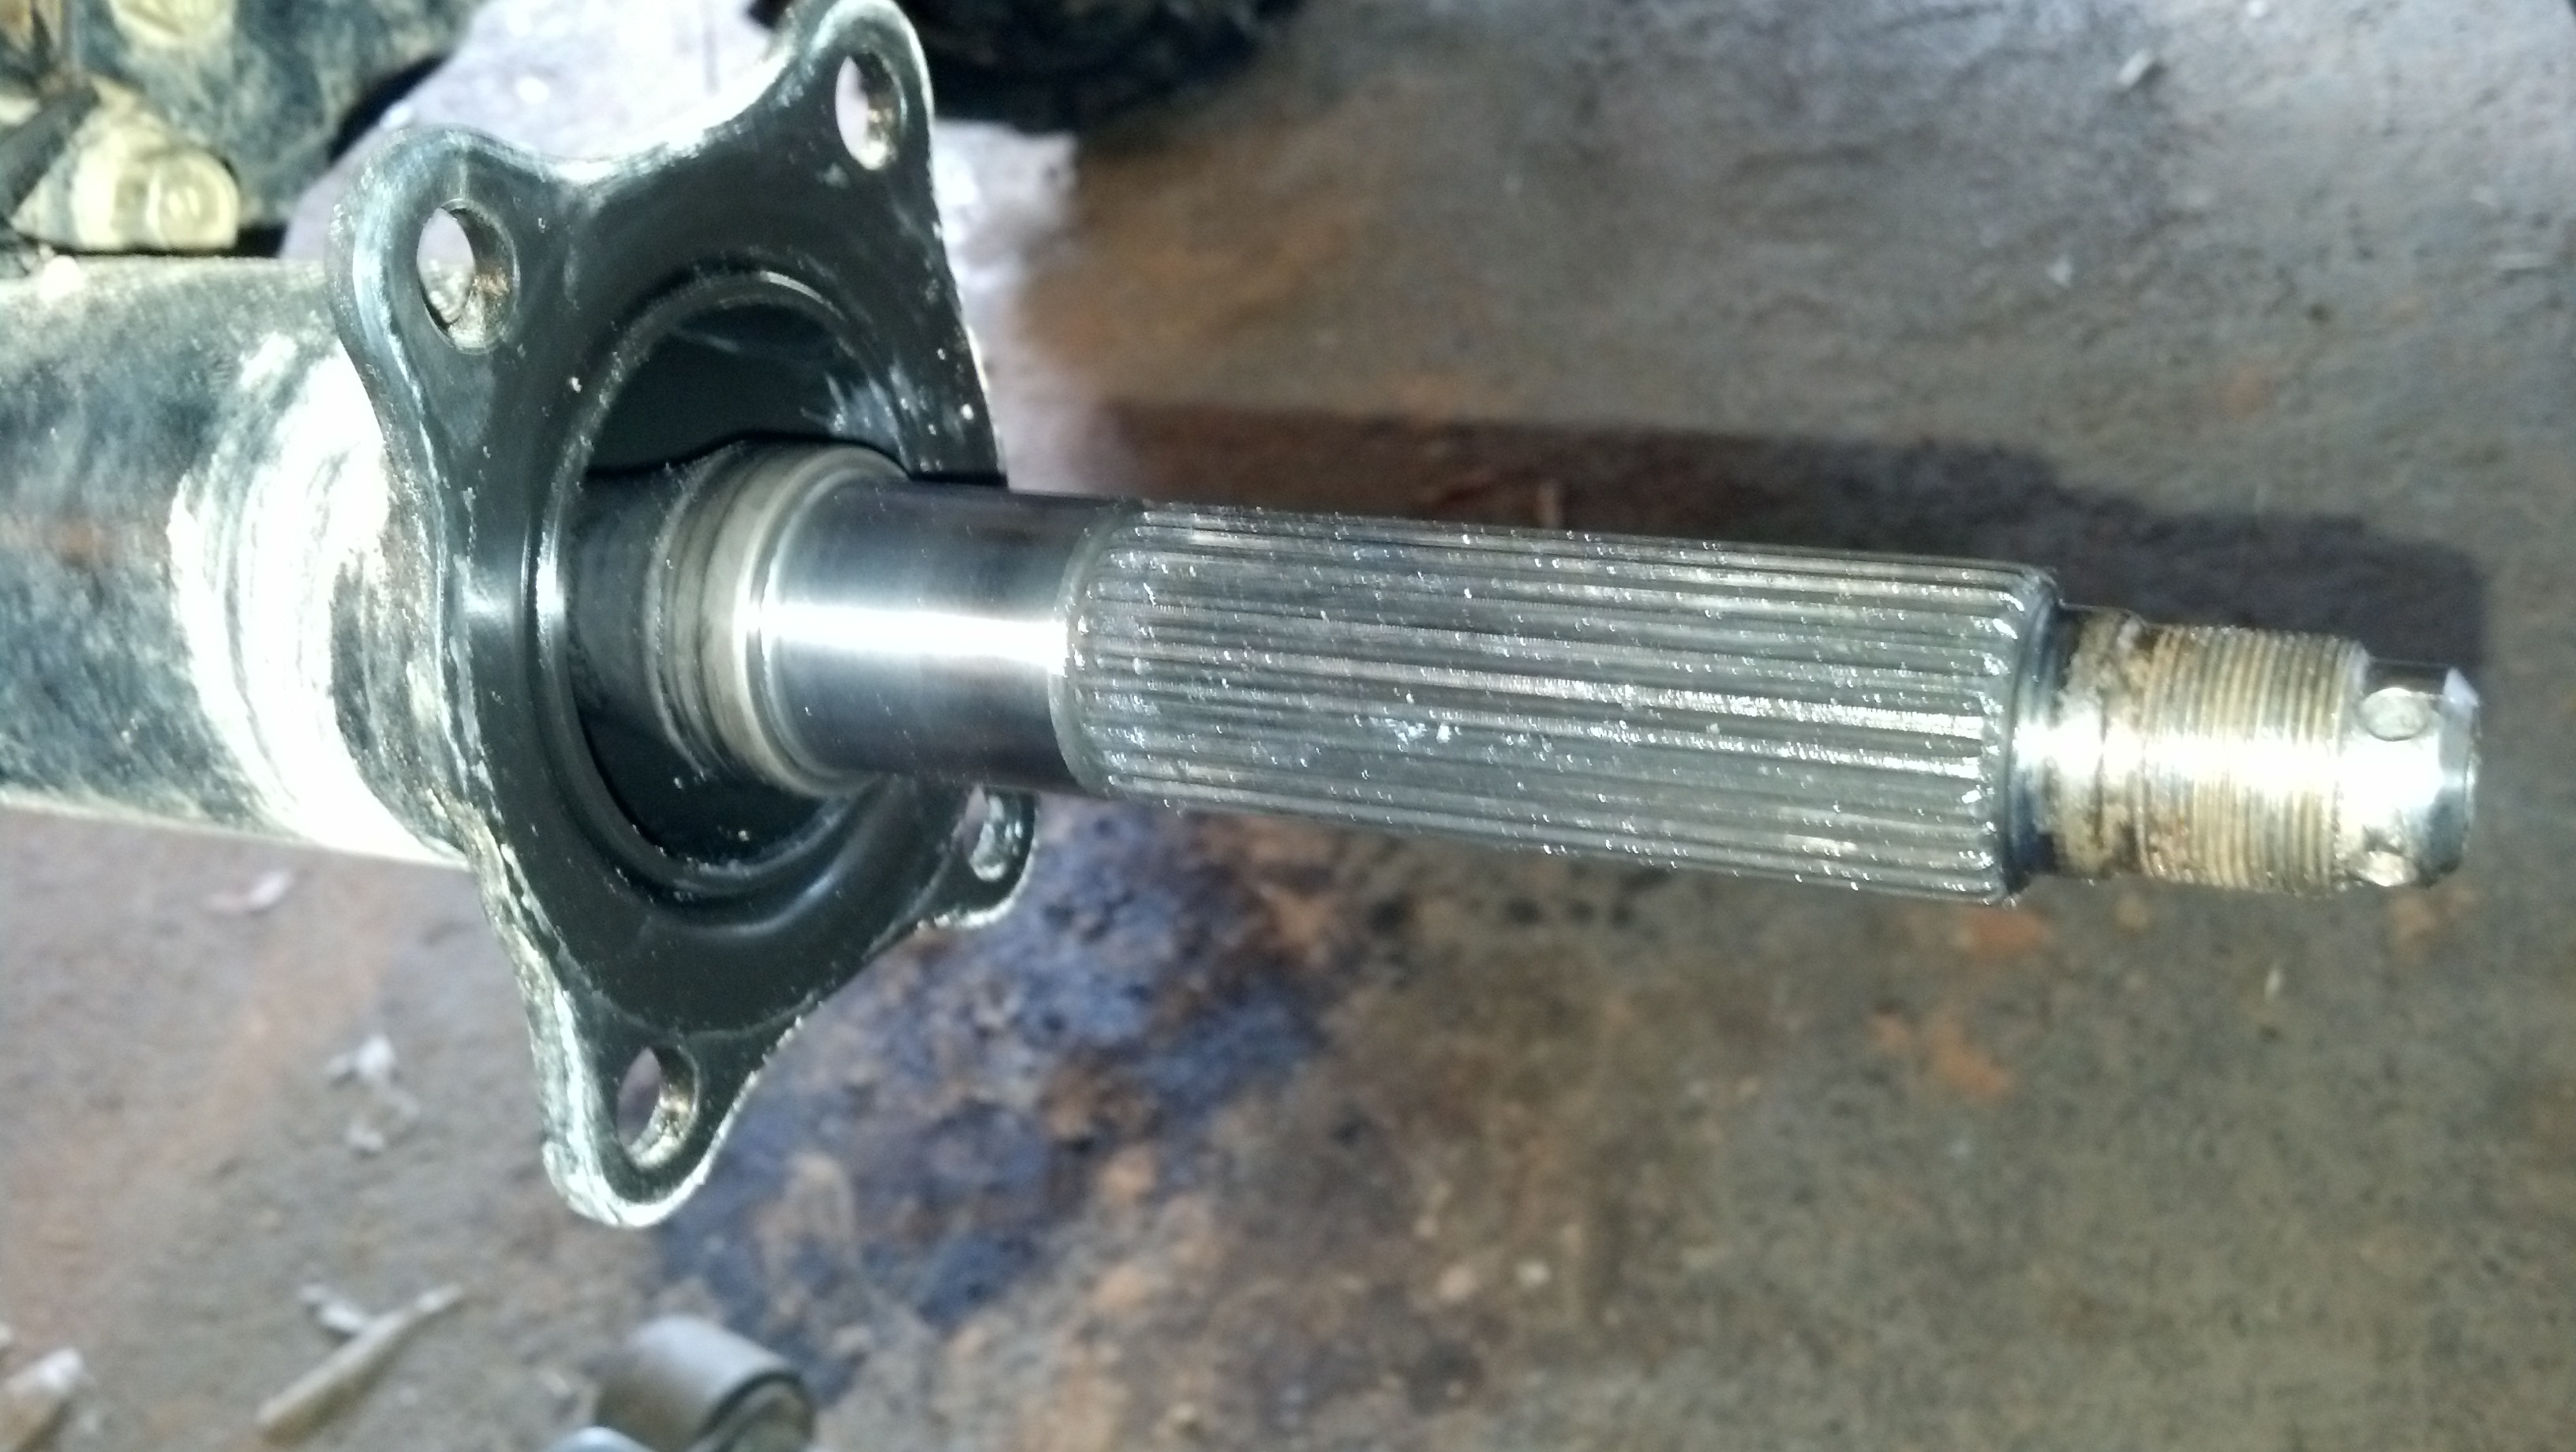
The o-ring that seals your bearing plate to your axle tube is plain not gonna stay in place without some help. The bearing needs to be lightly tapped on the axle, so apply some rtv of choice just to hold it in place while you position your bearing.
Here is the bearing plate, caliper bracket, and line bracket mocked up:
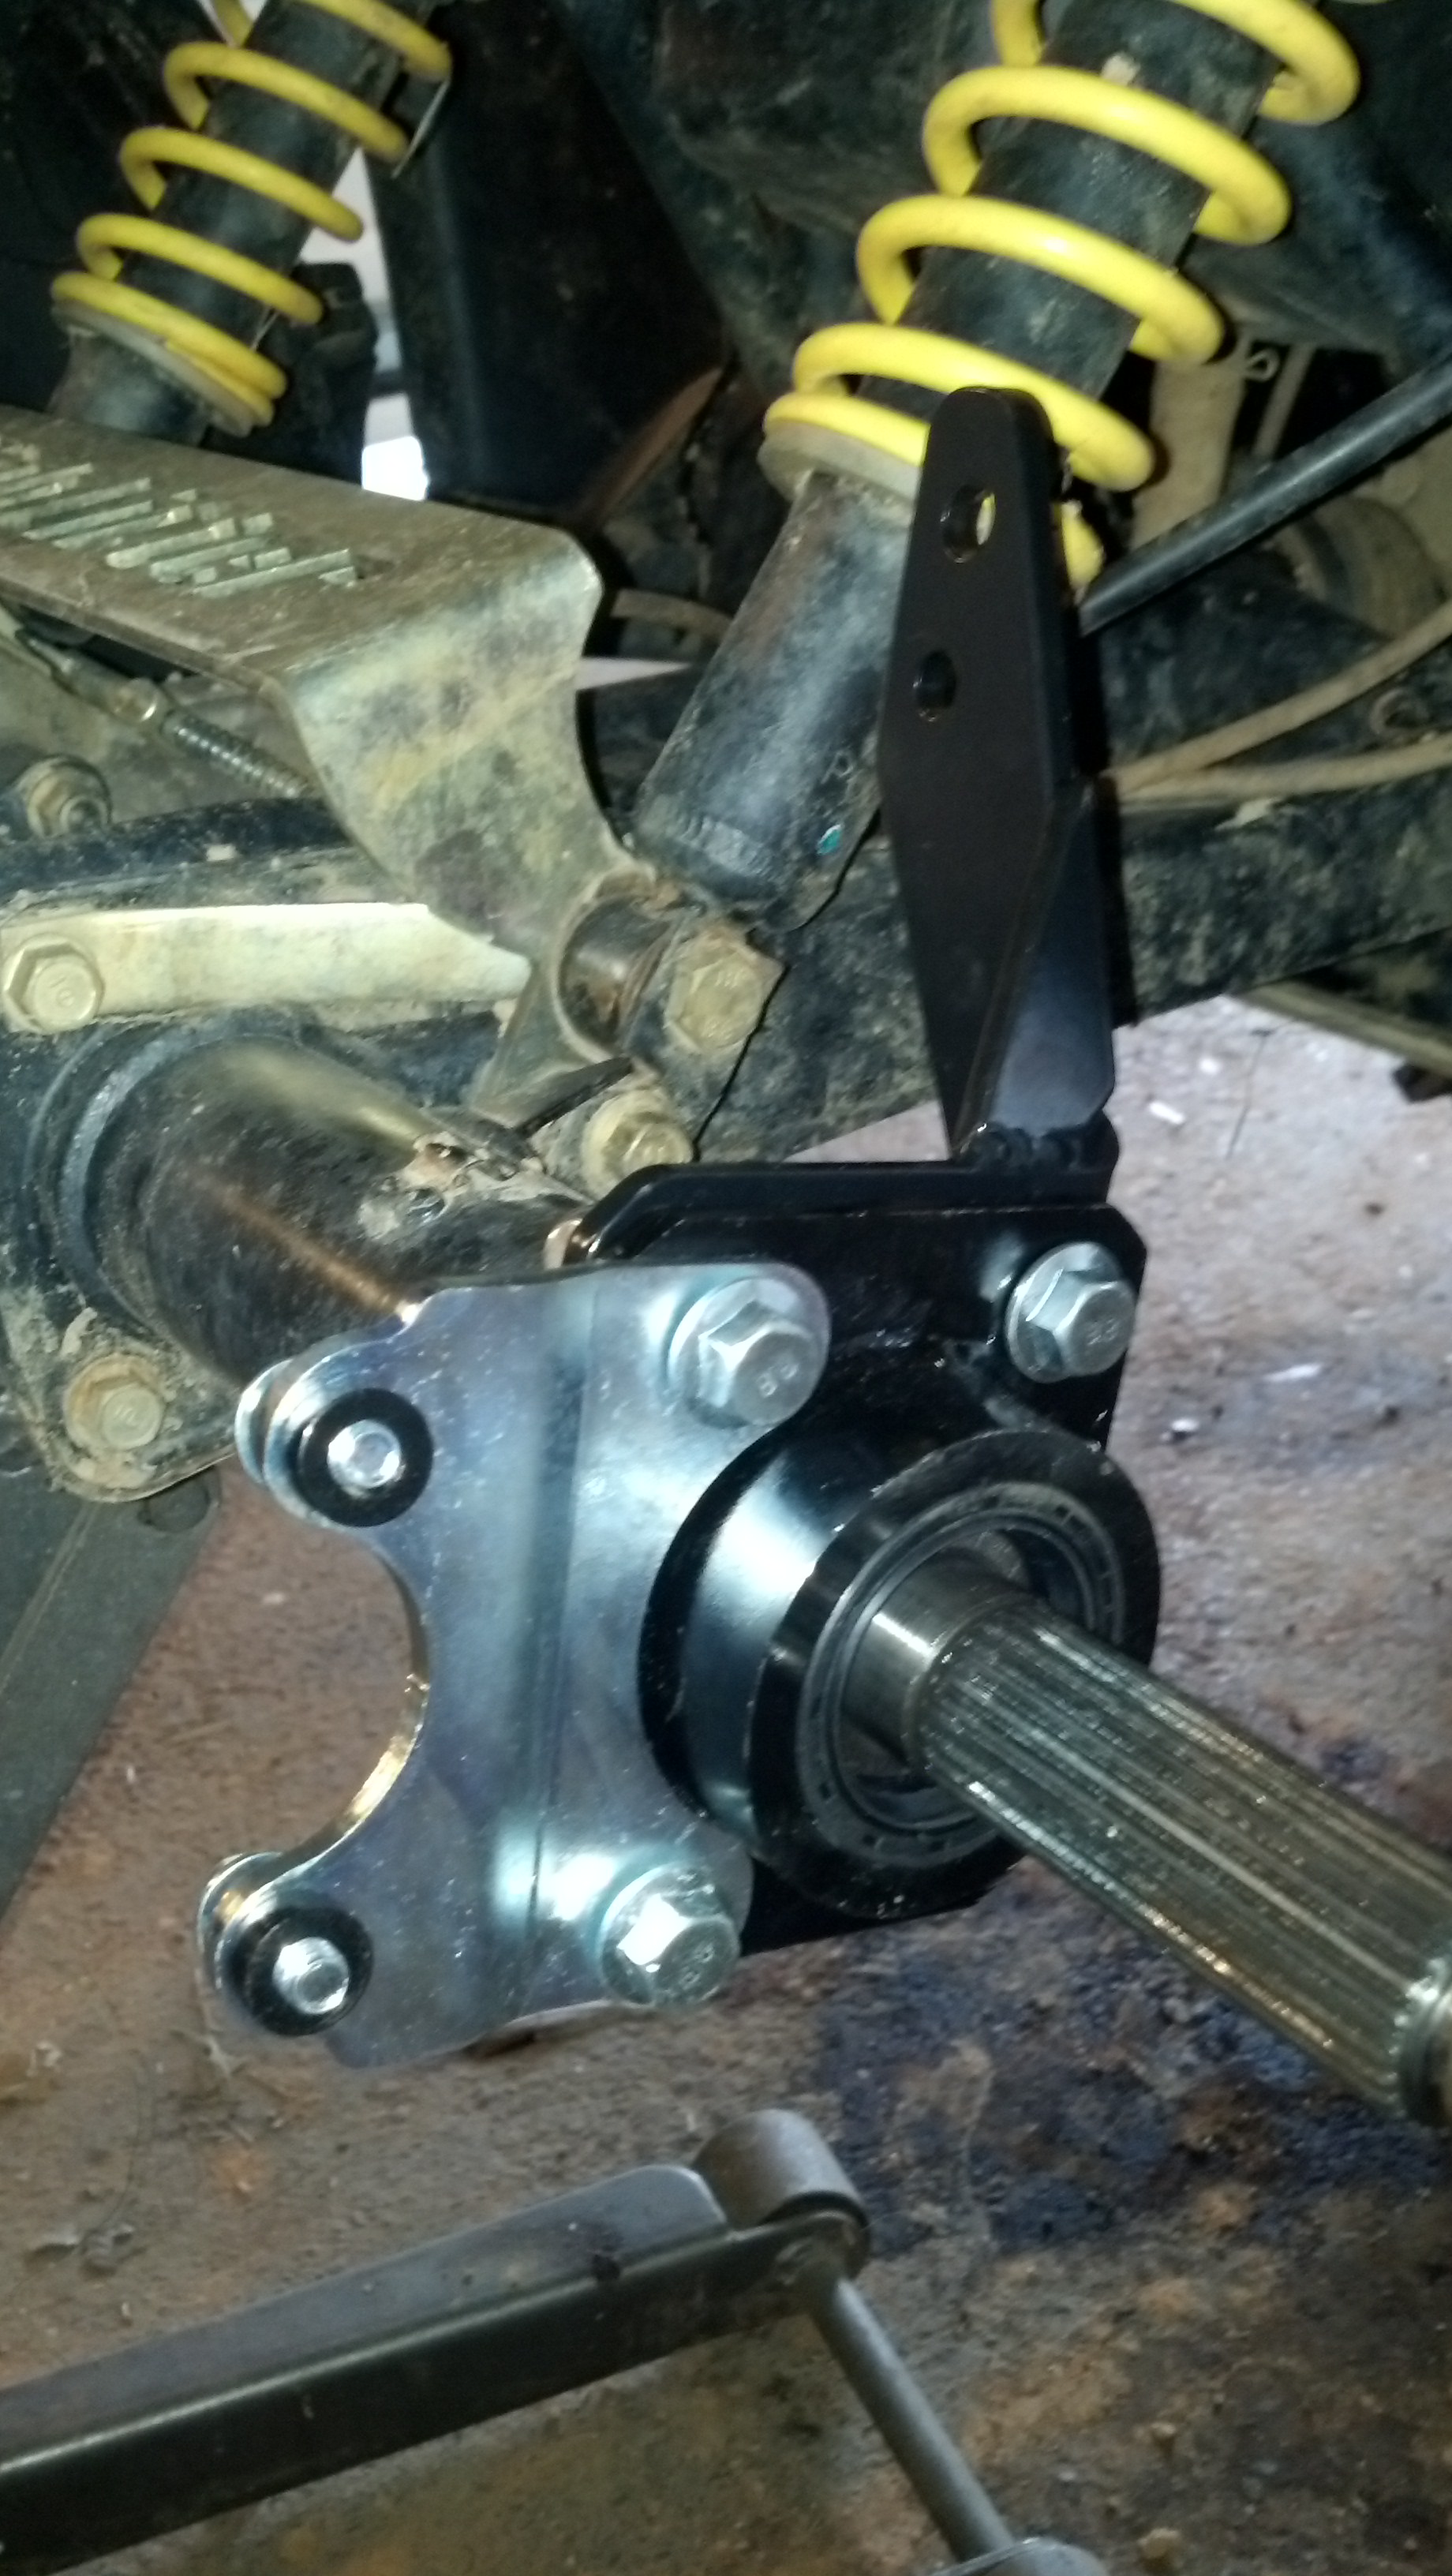
Here's another issue with this kit. The turn cam that drives the caliper closed is dry, I think it needs grease. Rotate it out of the caliper, add the grease/lube of your choice and re-insert. Also, the long bracket needs two things done, remove the powder coat out of the hex hole at the bottom, and two: remove the powder coat out of the slots, otherwise this will not go together. Hey at least the tolerances are nice and tight.

Threw the disc and caliper rear bracket on after the touches: Another issue, focus on the castle nut. They supply you a very thin washer, well its not thick enough. You will need to add 1/4" minimum in washer thickness or the disc will slight left and right because the castle nut runs out of threads before its tight. I put their wider washer first, then my thicker one next, then the castle and it worked perfect.
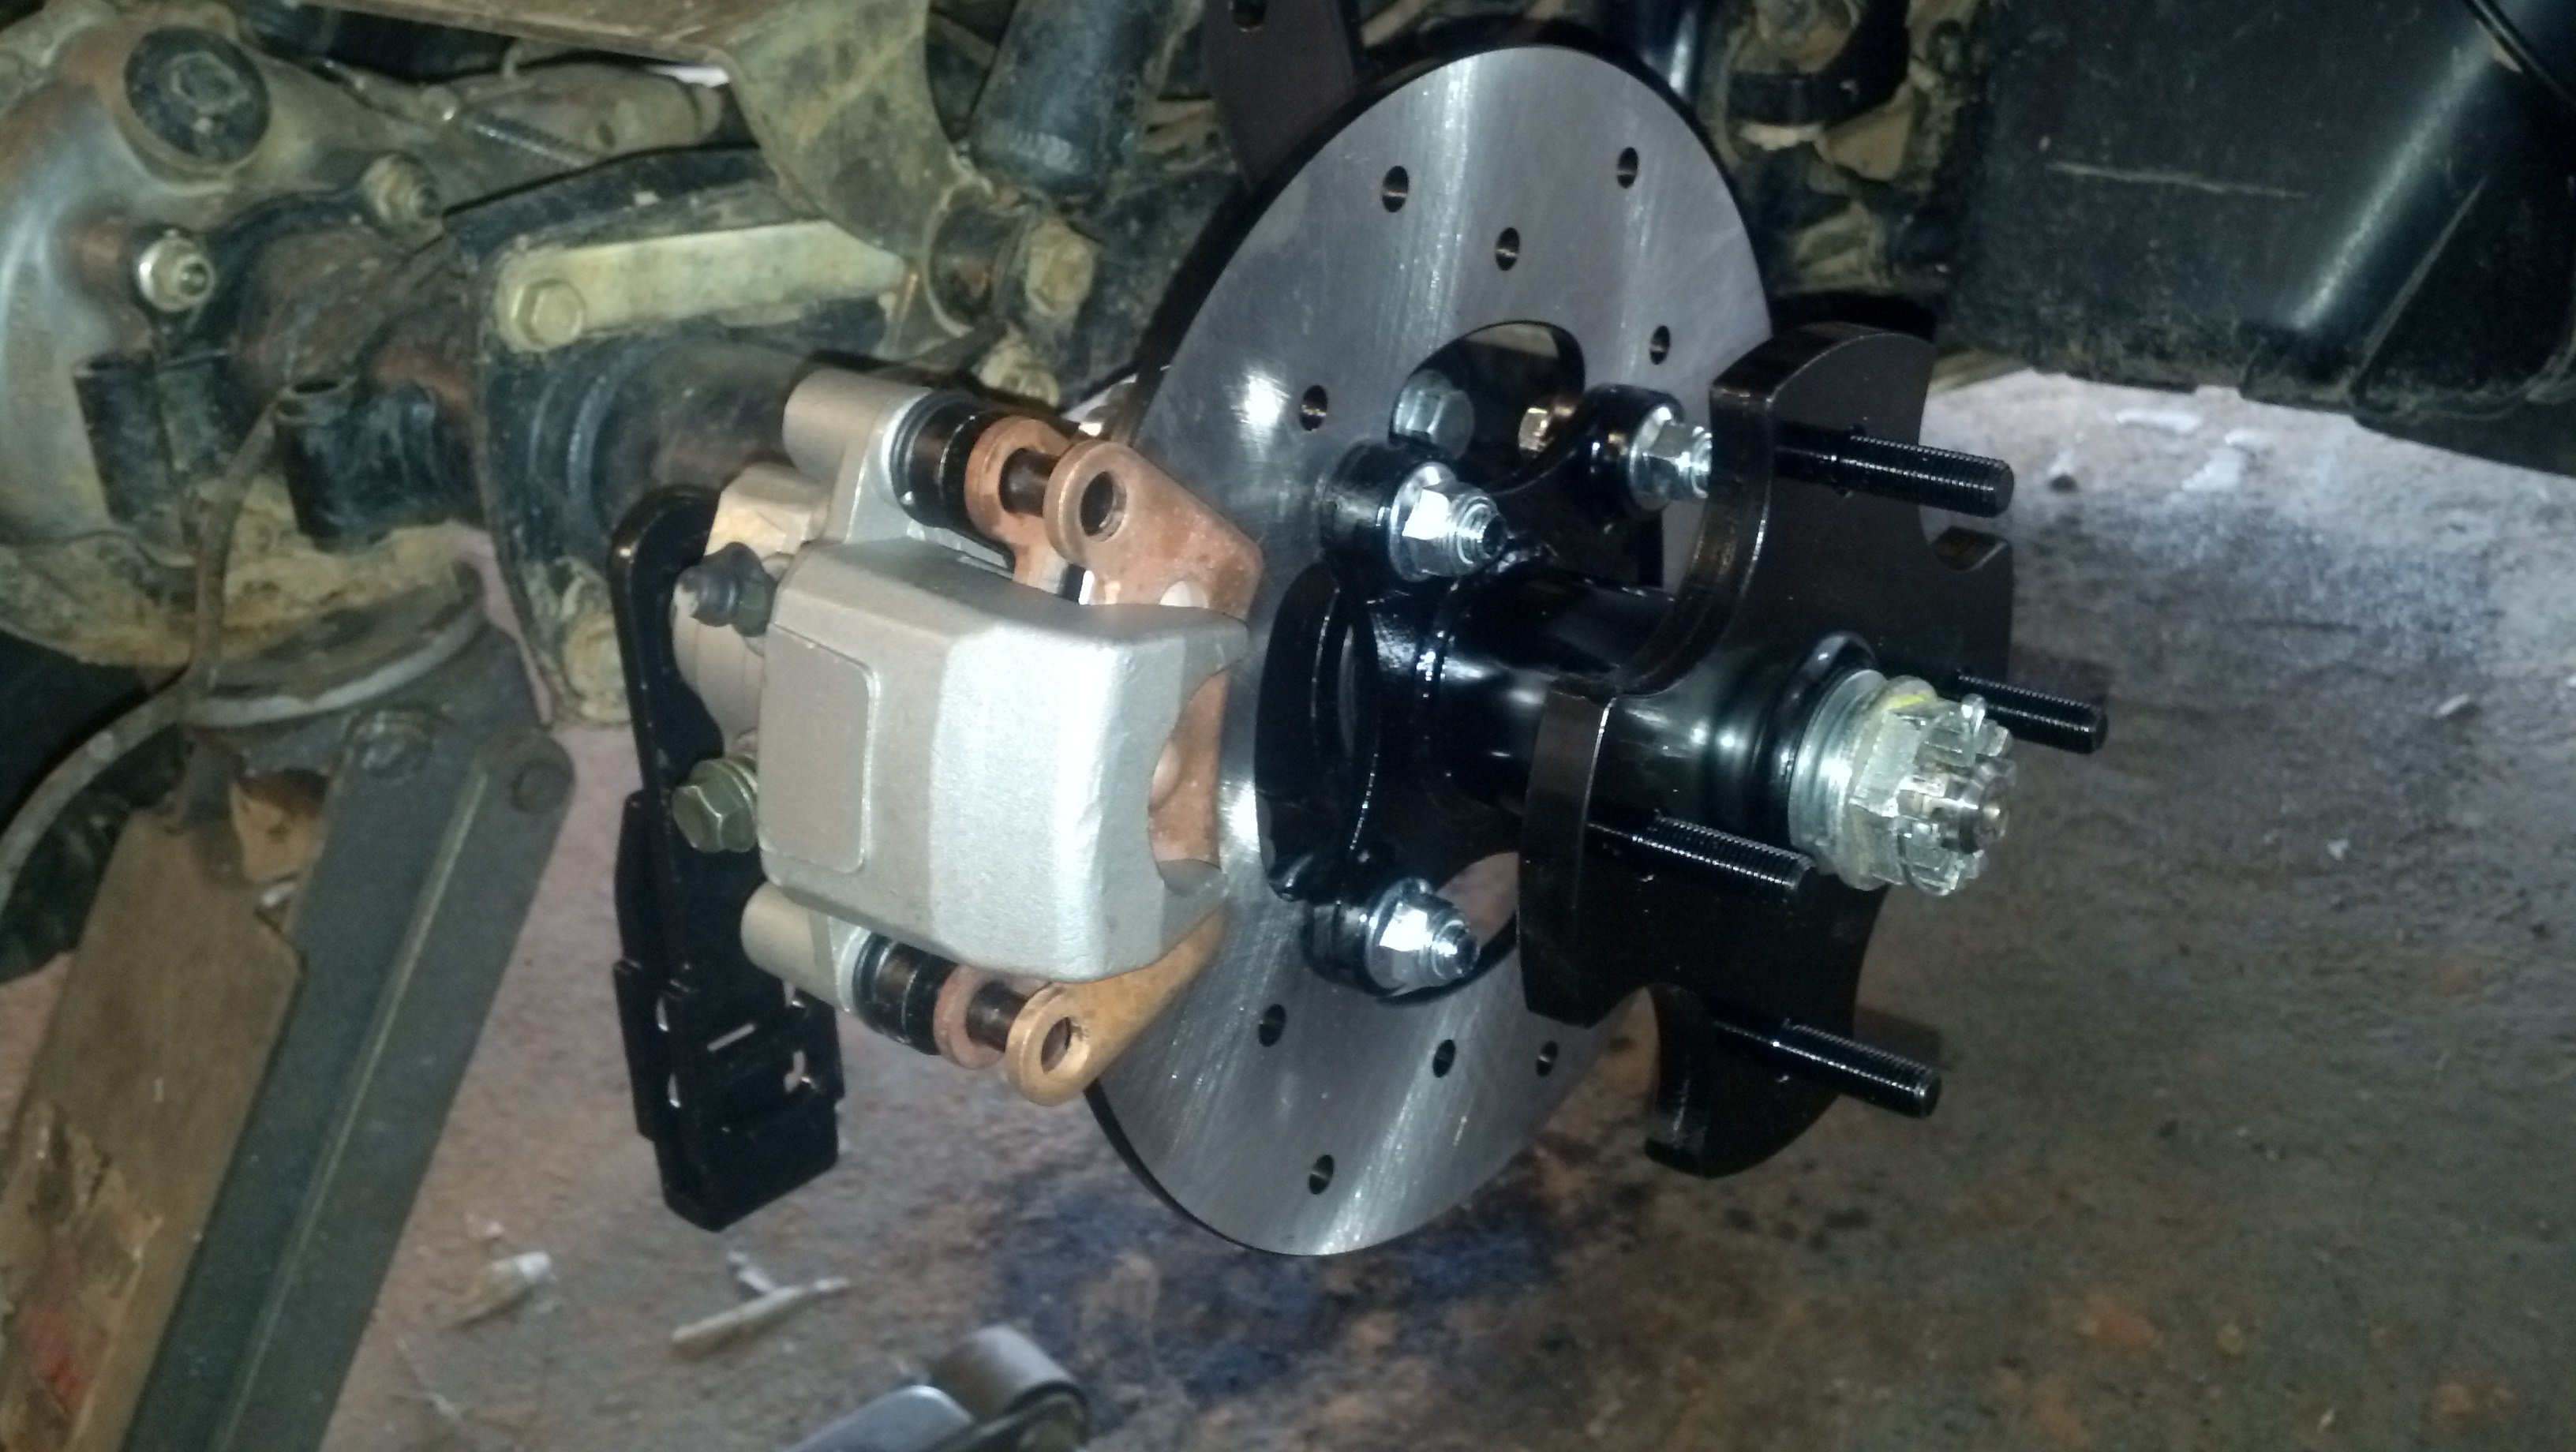
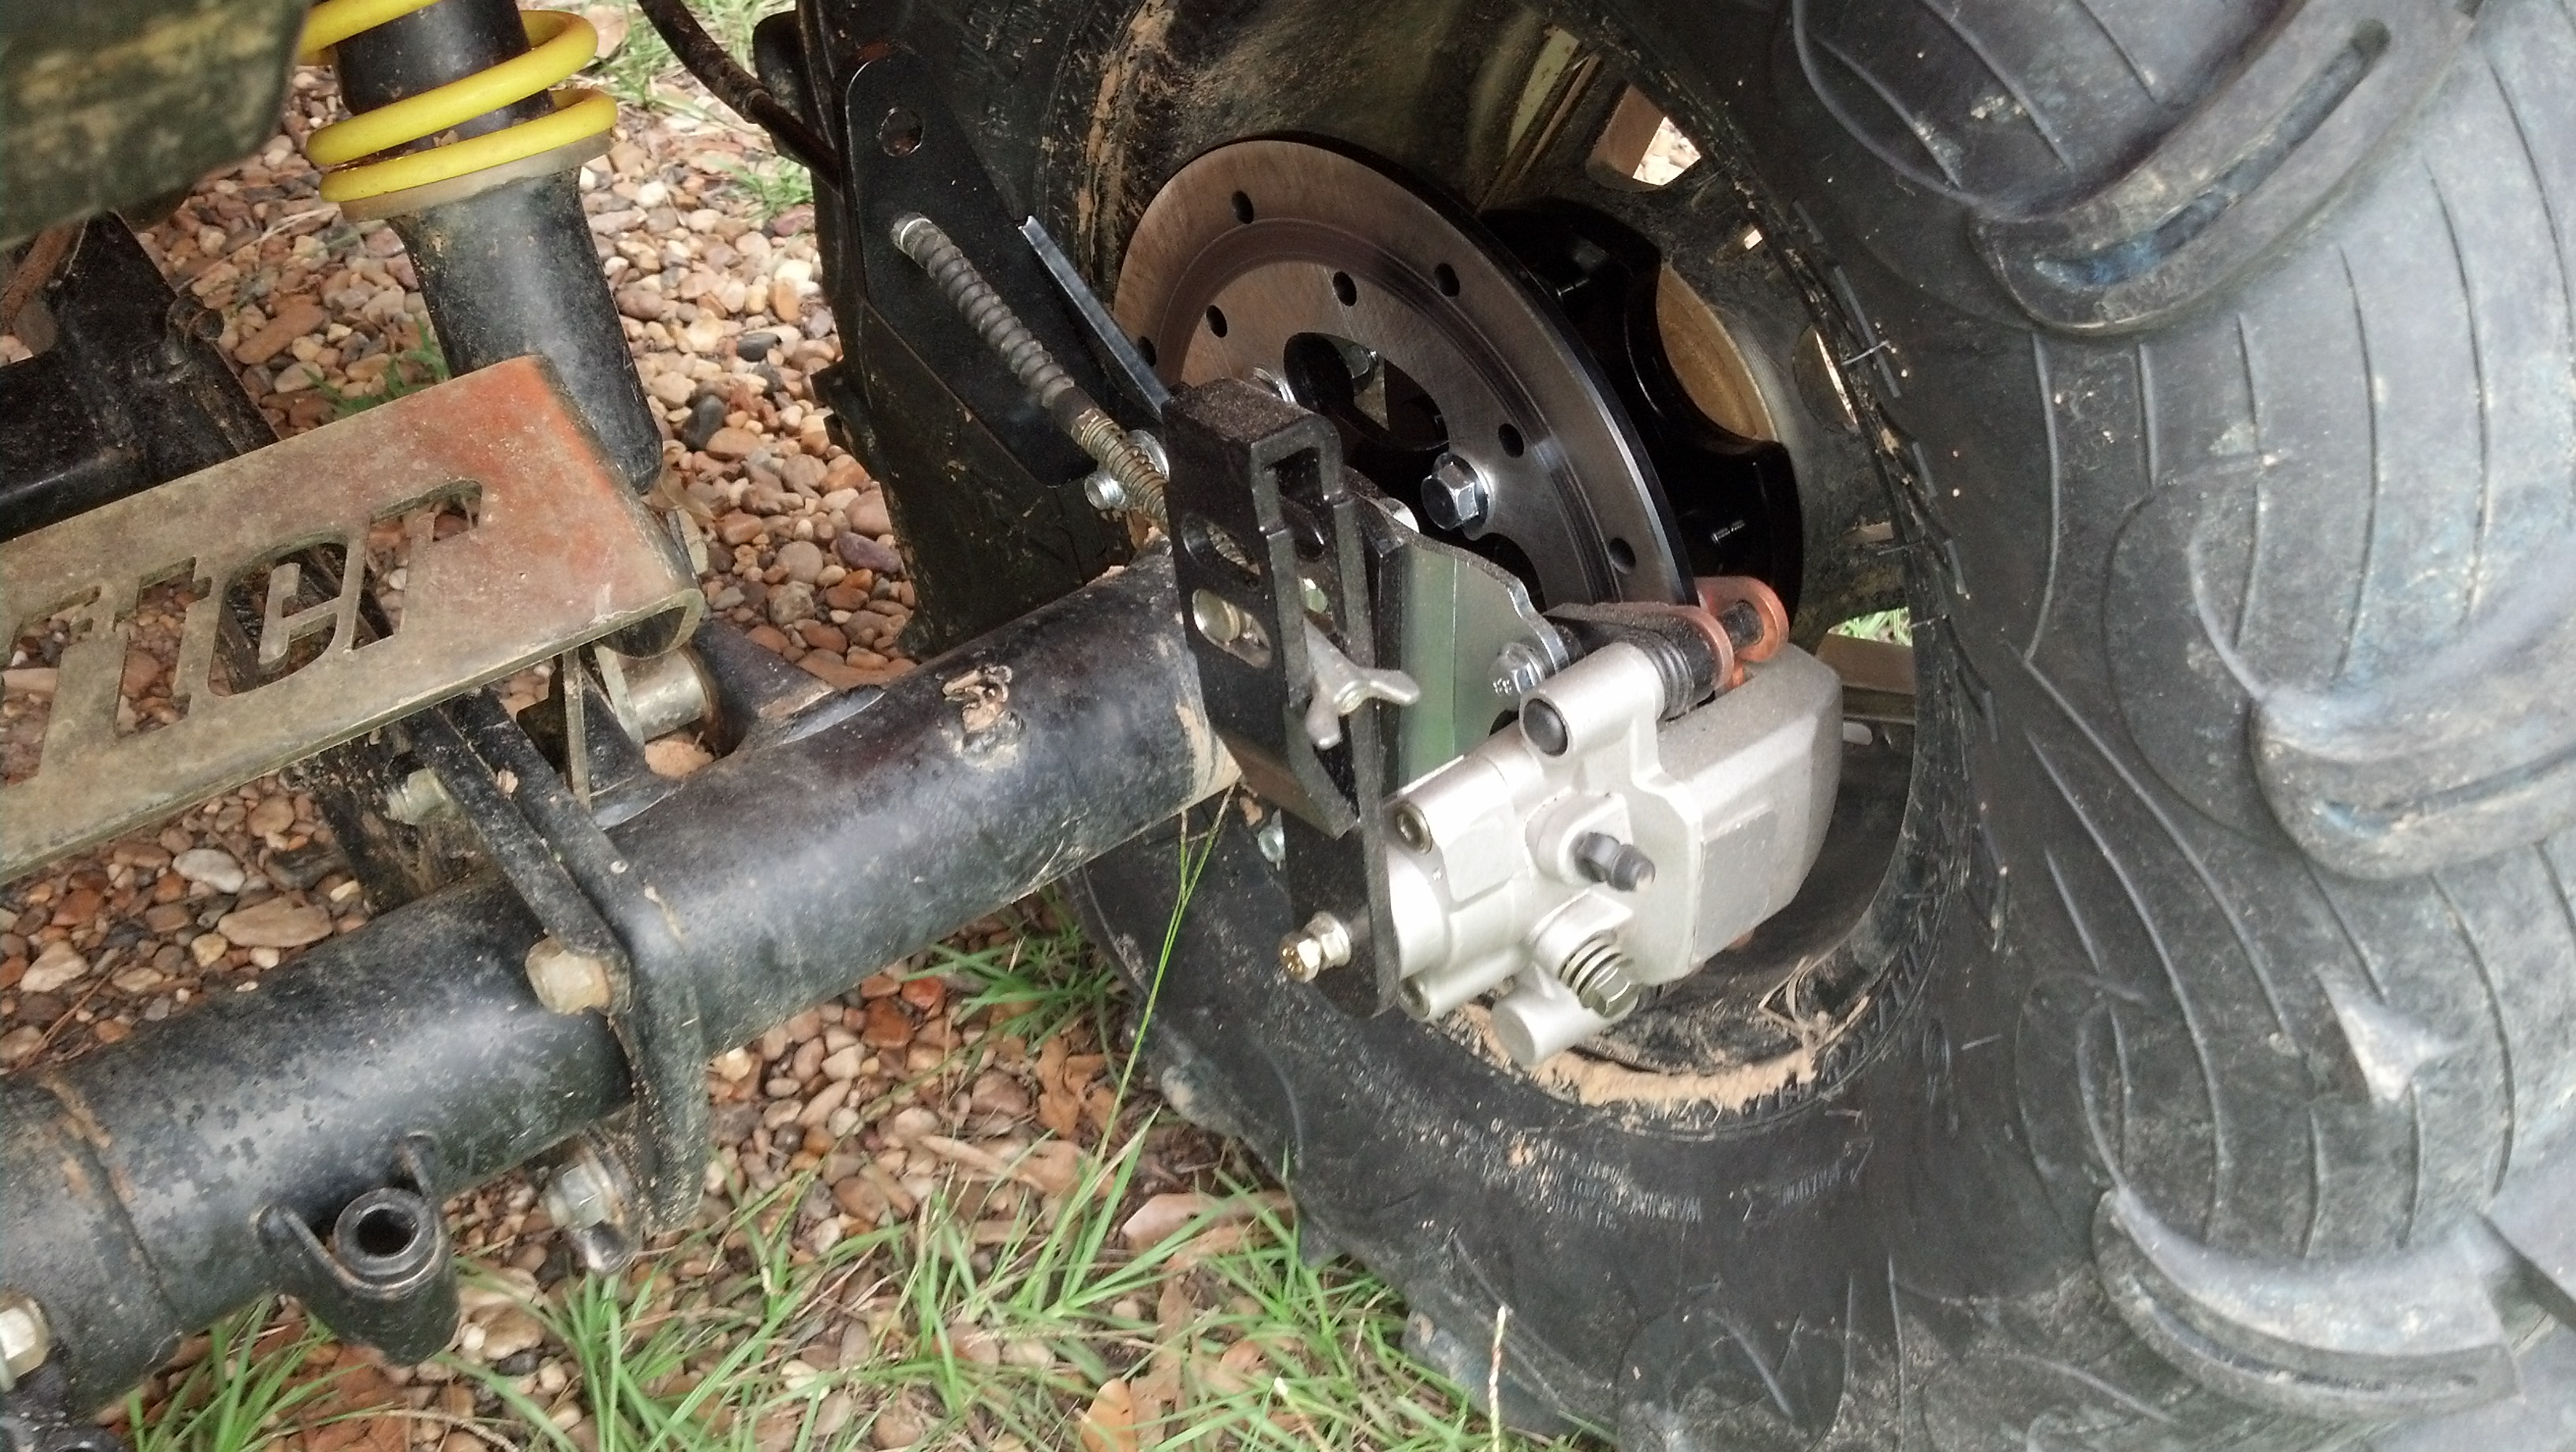
And this is fully assembled and adjusted. Huge improvement.

My driving impressions were: Good stopping power. If this was your only brake on the machine you could get by easily. I'd say it stops as good as a perfectly functioning drum setup, the difference is, this wont hold water and stop working. Should be easier/cheaper maintenance and upkeep also. Win/win.

Here is the bearing plate, caliper bracket, and line bracket mocked up:

Here's another issue with this kit. The turn cam that drives the caliper closed is dry, I think it needs grease. Rotate it out of the caliper, add the grease/lube of your choice and re-insert. Also, the long bracket needs two things done, remove the powder coat out of the hex hole at the bottom, and two: remove the powder coat out of the slots, otherwise this will not go together. Hey at least the tolerances are nice and tight.

Threw the disc and caliper rear bracket on after the touches: Another issue, focus on the castle nut. They supply you a very thin washer, well its not thick enough. You will need to add 1/4" minimum in washer thickness or the disc will slight left and right because the castle nut runs out of threads before its tight. I put their wider washer first, then my thicker one next, then the castle and it worked perfect.

And this is fully assembled and adjusted. Huge improvement.

My driving impressions were: Good stopping power. If this was your only brake on the machine you could get by easily. I'd say it stops as good as a perfectly functioning drum setup, the difference is, this wont hold water and stop working. Should be easier/cheaper maintenance and upkeep also. Win/win.

#5
07-31-2014, 09:15 AM
Extreme Pro Rider
God forbid he lets the polishing secret out!
God forbid he lets the polishing secret out!
Join Date: Jul 2006
Posts: 11,807
Likes: 0
Received 0 Likes
on
0 Posts
#6
07-31-2014, 11:02 AM
Join Date: Aug 2010
Posts: 230
Likes: 0
Received 0 Likes
on
0 Posts
#7
07-31-2014, 11:10 AM
Extreme Pro Rider
God forbid he lets the polishing secret out!
God forbid he lets the polishing secret out!
Join Date: Jul 2006
Posts: 11,807
Likes: 0
Received 0 Likes
on
0 Posts
Trending Topics
#8
08-05-2014, 09:43 PM

what will this kit really fit ? , they list it as fitting the 1988-2000 TRX300 FW or A utility models but then have an asterisk stating it doesn't fit a rear end with the brake drum against the swing arm , all 300's have the brake against the swing arm --------- also I am interested if it will fit the rear end used in the 85-87 TRX250A Fourtrax , the 86-87 Big Red ATC250 or the 1986-87 TRX350D , this rear end has the brake drum tucked into the rim but has a smaller axle diameter than the 300's
#9
08-15-2014, 04:09 PM
Join Date: Aug 2010
Posts: 230
Likes: 0
Received 0 Likes
on
0 Posts
#10
08-16-2014, 08:08 AM
...think about what you just said , it has to attach some where other than just " where the bearing rides " , if not when you applied the brake it would not stop the bike , the hub that the disc is mounted to has to be splined , key wayed or welded to the axle -------- that is my concern , I use the rear ends out of the 86-87 trx 250 , trx 350 and atc 250es , in my 300's , all these rear ends have the drum on the outside end of the axle but all use a smaller diameter spline on the axle for the brake drum ----- it seems to me the kit really don't fit much that didn't already have disc brakes on it to start